Migrating the Citrix Site database to a new database server is pretty straight forward but needs to be planned since there is a downtime when making the switch.
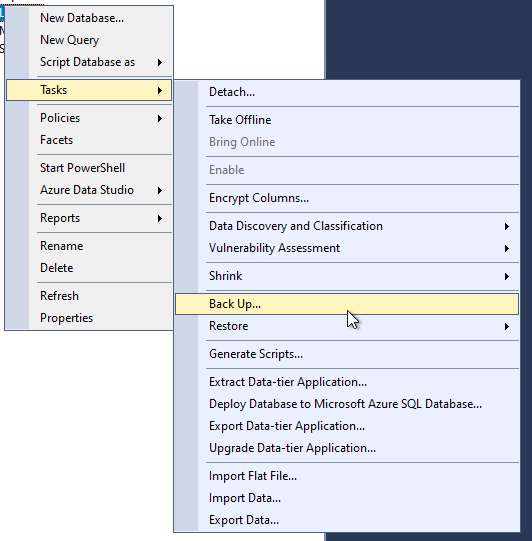
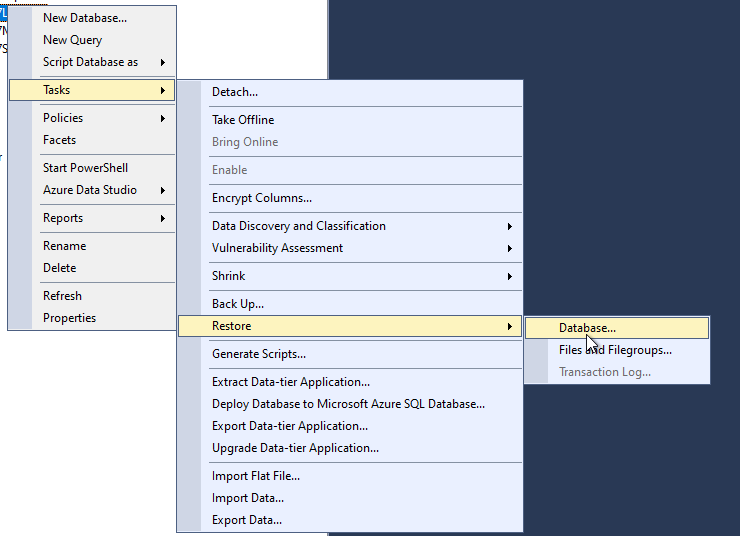
First of all, take a backup of the database with SQL Server Management Studio and restore the database on the new server:
Select the file that has just been backed up.
Run a new query with CTRL + N and add the DDC’s (Delivery Controller) computer account:
create login [domain\ctx1$] from windows
Make sure the computer account has proper roles under Security > Logins > domain\ctx1$ > right click > properties (the computer account needs to have all permission ending with _ROLE in all three databases).
Step 1 is to remove the old database connection string:
Add-PSSnapin Citrix*
Set-LogSite -State Disabled
Set-MonitorConfiguration -DataCollectionEnabled $false
Set-LogDBConnection -DataStore Logging -DBConnection $null
Set-MonitorDBConnection -DataStore Monitor -DBConnection $null
Set-MonitorDBConnection -DBConnection $null
Set-AcctDBConnection -DBConnection $null
Set-AnalyticsDBConnection -DBConnection $null
Set-AppLibDBConnection -DBConnection $null
Set-ProvDBConnection -DBConnection $null
Set-BrokerDBConnection -DBConnection $null
Set-EnvTestDBConnection -DBConnection $null
Set-SfDBConnection -DBConnection $null
Set-HypDBConnection -DBConnection $null
Set-OrchDBConnection -DBConnection $null
Set-TrustDBConnection -DBConnection $null
Set-ConfigDBConnection -DBConnection $null -force
Set-LogDBConnection -DBConnection $null -force
Set-AdminDBConnection -DBConnection $null -force
Step 2 is to check whether you are able to connect to the new database server. If that does not work, the SQL Server Ports (UDP 1434 for SQL Server Browser and a high port for the SQL server instance) need to be enabled in Windows Firewall. You might also need to enable TCP/IP in SQL Server configuration manager if you are using SQL Server Express.
$SQLServer = “ctxdb\sqlexpress”
$SiteDBName = “citrixsite”
$DBConnectSite = “Server=$SQLServer;Initial Catalog=$SiteDBName;Integrated Security=True”
Test-AdminDBConnection -DBConnection $DBConnectSite
Test-AcctDBConnection -DBConnection $DBConnectSite
Test-AnalyticsDBConnection -DBConnection $DBConnectSite
Test-AppLibDBConnection -DBConnection $DBConnectSite
Test-BrokerDBConnection -DBConnection $DBConnectSite
Test-ConfigDBConnection -DBConnection $DBConnectSite
Test-EnvTestDBConnection -DBConnection $DBConnectSite
Test-HypDBConnection -DBConnection $DBConnectSite
Test-LogDBConnection -DBConnection $DBConnectSite
Test-MonitorDBConnection -DBConnection $DBConnectSite
Test-OrchDBConnection -DBConnection $DBConnectSite
Test-TrustDBConnection -DBConnection $DBConnectSite
Test-ProvDBConnection -DBConnection $DBConnectSite
Test-SfDBConnection -DBConnection $DBConnectSite
Step 3 is to set the new database connection string
Add-PSSnapin Citrix*
$SQLServer = “ctxdb\sqlexpress”
$SiteDBName = “CitrixSite”
$LogDBName = “CitrixLogging”
$MonDBName = “CitrixMonitoring”
$DBConnectSite = “Server=$SQLServer;Initial Catalog=$SiteDBName;Integrated Security=True”
$DBConnectLog = “Server=$SQLServer;Initial Catalog=$LogDBName;Integrated Security=True”
$DBConnectMon = “Server=$SQLServer;Initial Catalog=$MonDBName;Integrated Security=True”
Set-AdminDBConnection -DBConnection $DBConnectSite
Set-ConfigDBConnection -DBConnection $DBConnectSite
Set-AcctDBConnection -DBConnection $DBConnectSite
Set-AnalyticsDBConnection -DBConnection $DBConnectSite
Set-AppLibDBConnection -DBConnection $DBConnectSite
Set-ProvDBConnection -DBConnection $DBConnectSite
Set-BrokerDBConnection -DBConnection $DBConnectSite
Set-EnvTestDBConnection -DBConnection $DBConnectSite
Set-OrchDBConnection -DBConnection $DBConnectSite
Set-TrustDBConnection -DBConnection $DBConnectSite
Set-SfDBConnection -DBConnection $DBConnectSite
Set-HypDBConnection -DBConnection $DBConnectSite
Set-LogDBConnection -DBConnection $DBConnectSite
Set-LogDBConnection -DataStore Logging -DBConnection $DBConnectLog
Set-MonitorDBConnection -DBConnection $DBConnectSite
Set-MonitorDBConnection -DataStore Monitor -DBConnection $DBConnectMon
Set-MonitorConfiguration -DataCollectionEnabled $true
Set-LogSite -State Enabled
In Step 4 Citrix services need to be stopped and started (Do NOT use Restart-Service!)
Get-Service Citrix* | Stop-Service -Force
Get-Service Citrix* | Start-Service
Step 5: Check if are connections are OK
Get-AcctServiceStatus
Get-AdminServiceStatus
Get-AnalyticsServiceStatus
Get-AppLibServiceStatus
Get-BrokerServiceStatus
Get-ConfigServiceStatus
Get-EnvTestServiceStatus
Get-HypServiceStatus
Get-LogServiceStatus
Get-MonitorServiceStatus
Get-OrchServiceStatus
Get-TrustServiceStatus
Get-ProvServiceStatus
Get-SfServiceStatus
Optionally, you can check if the new connection string is configured for every service that needs the database.
Get-MonitorDBConnection
Get-AcctDBConnection
Get-AnalyticsDBConnection
Get-AppLibDBConnection
Get-ProvDBConnection
Get-BrokerDBConnection
Get-EnvTestDBConnection
Get-SfDBConnection
Get-HypDBConnection
Get-OrchDBConnection
Get-TrustDBConnection
Get-ConfigDBConnection
Get-LogDBConnection
Get-AdminDBConnection
References: