If you are having issues with some users having freeze issues and high response time in Citrix Director, this registry key might help you. It happens in conjunction with dedicated GPUs on notebooks. The key disabled GPU acceleration for Citrix Workspace App.
There is a new fix that seems to be better and does not clear any registry keys. Instead it activates Citrix Universal DLL Injection. After upgrading the VDA, make sure this value is set:
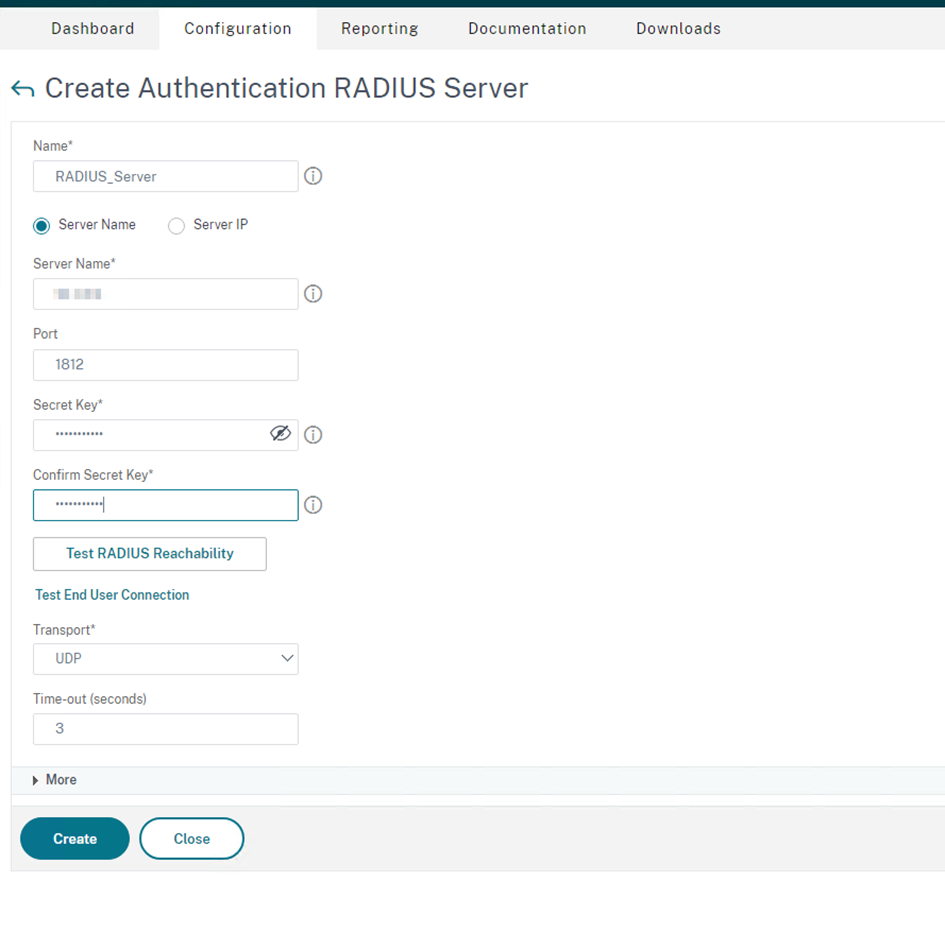
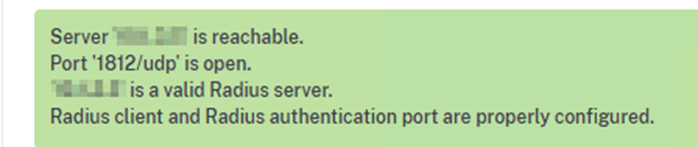
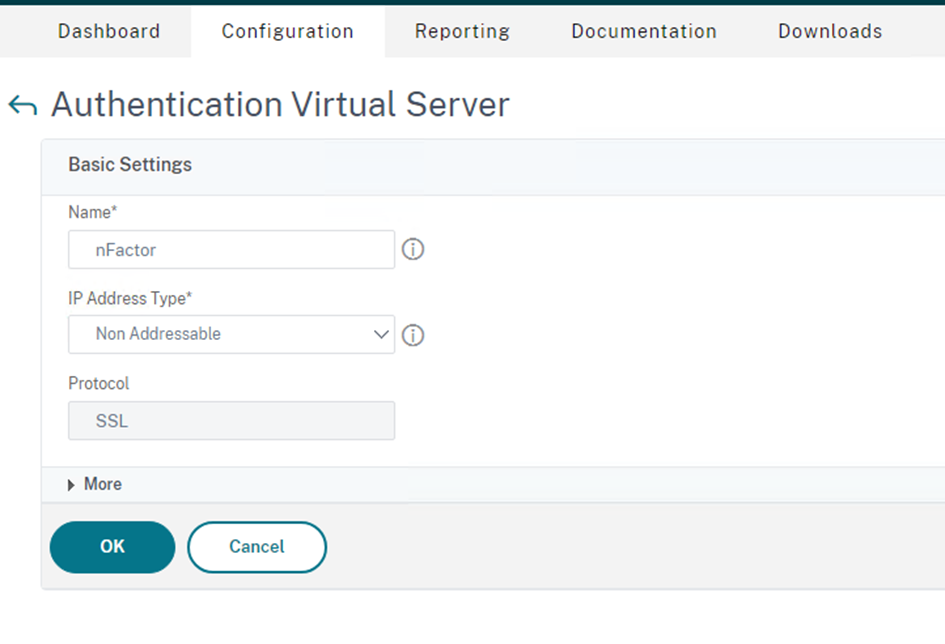
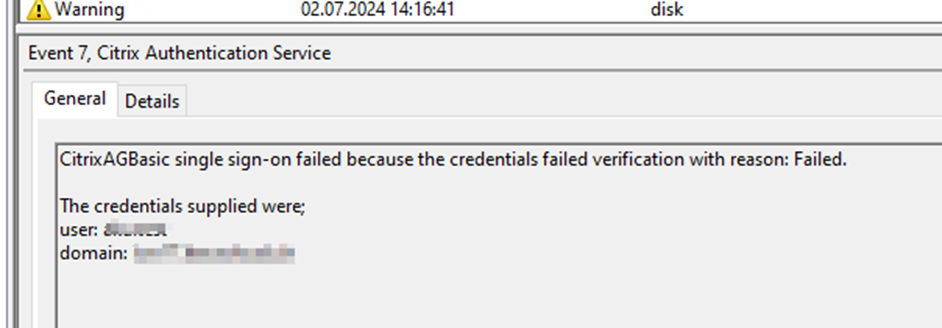
In this article we are going to configure password change through Citrix Netscaler, which is very handy nowadays that a lot of people work from home and are rarely in the office. The steps are very simple but you should always think what the impact of the change could be before blindy following my screenshots.
You can also insert multiple Subject Alternative Names separated by comma, that might include two or more Domain Controllers like in the example above.
Testing can be done with lpd.exe, make sure that the newly generated certificate is also placed in the Trusted Root Certificate Authorities.
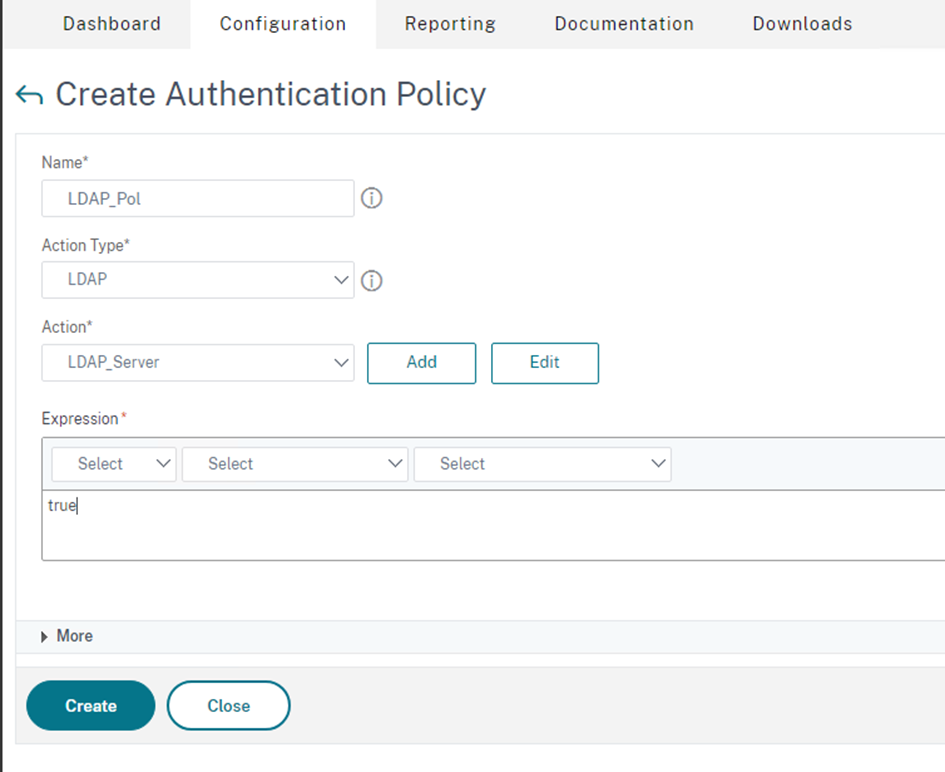
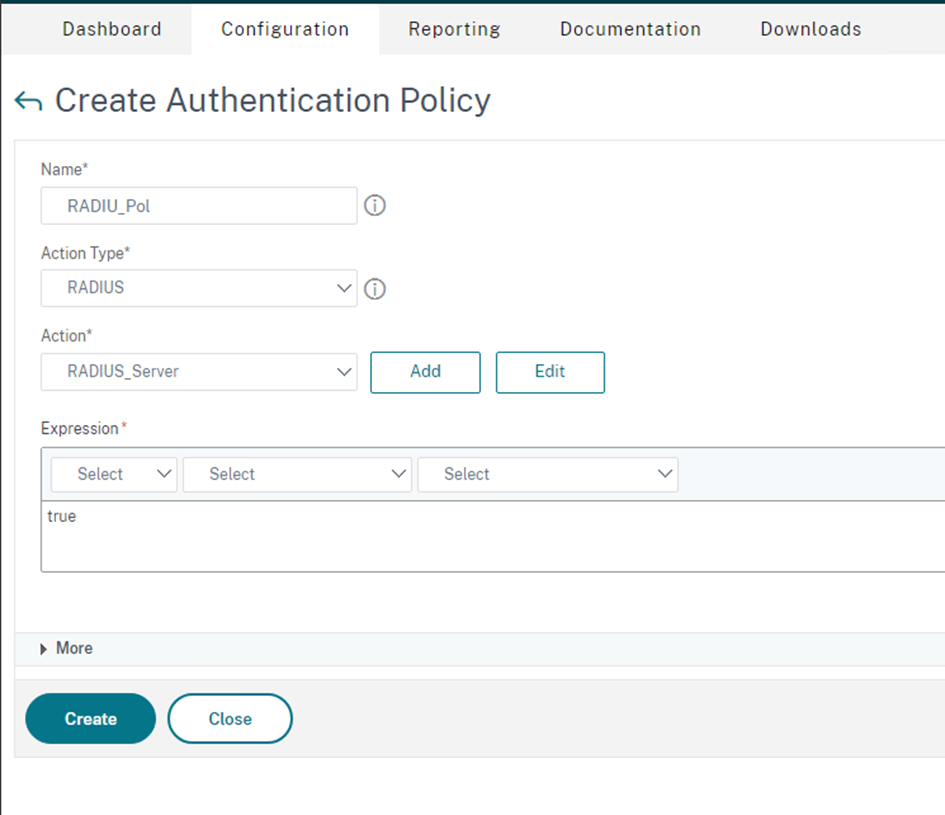
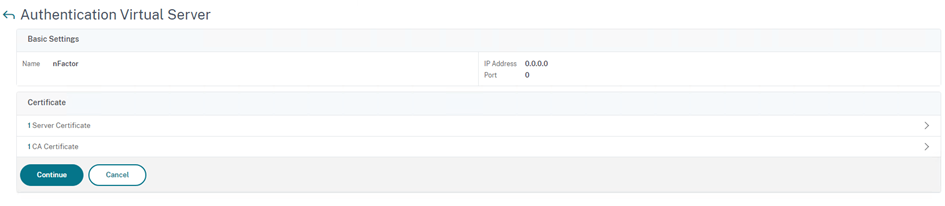
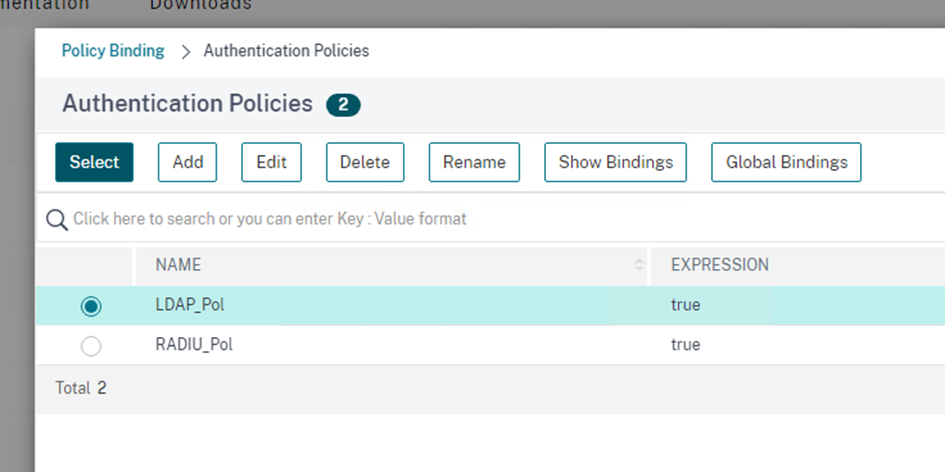
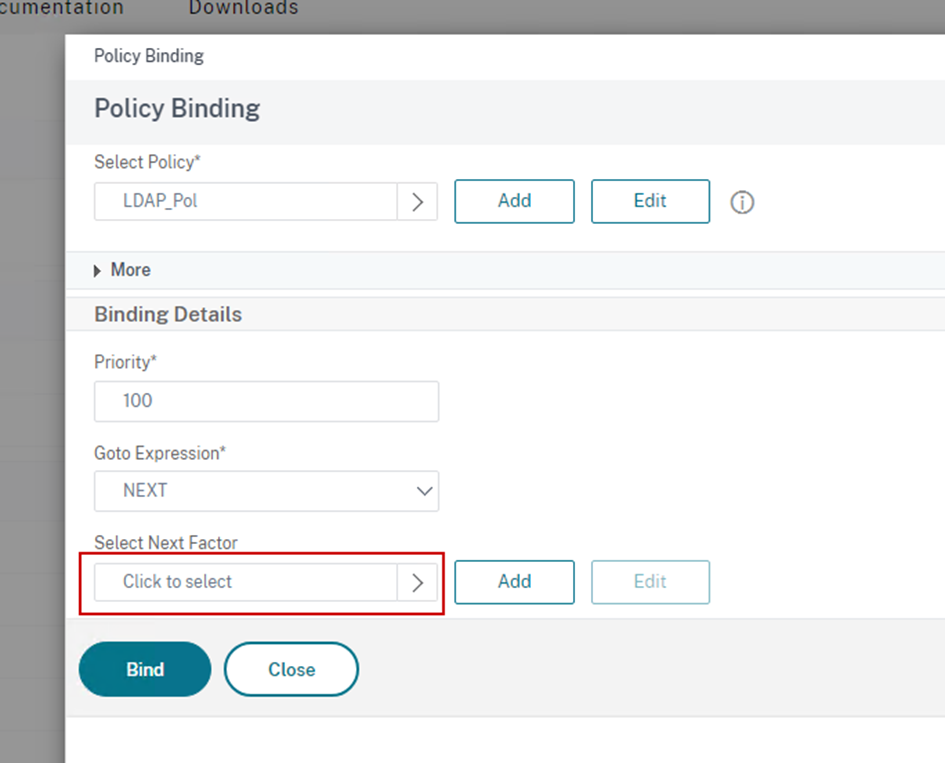
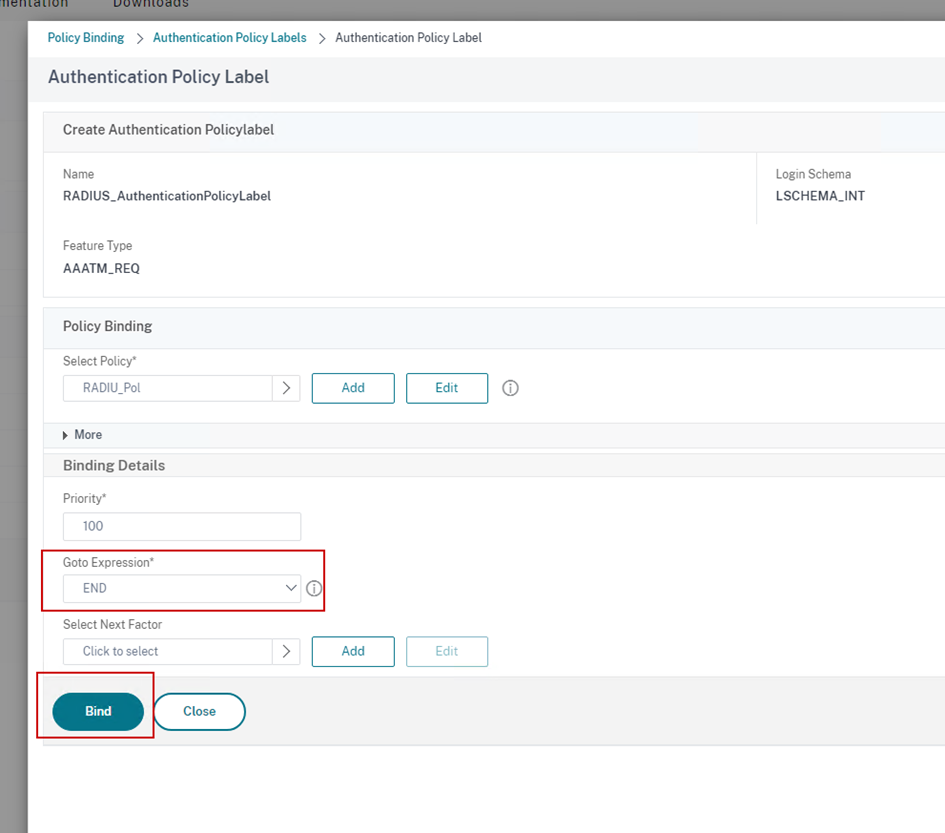
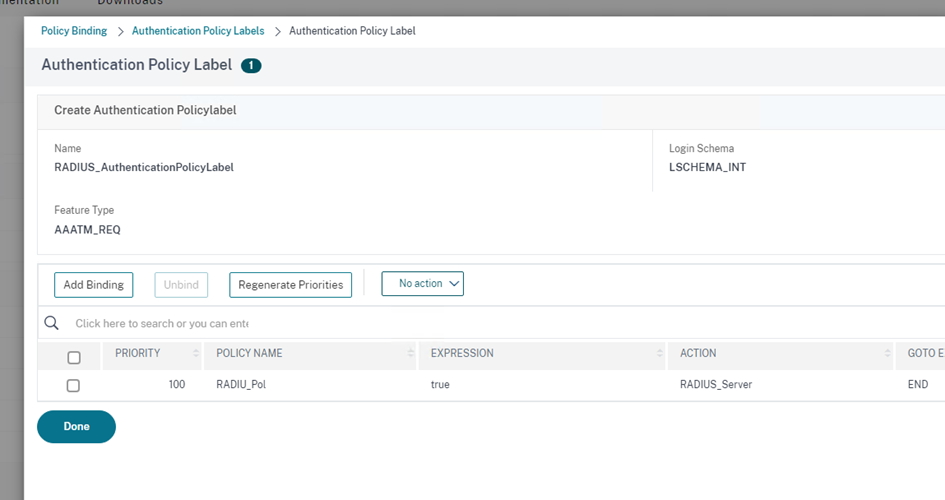
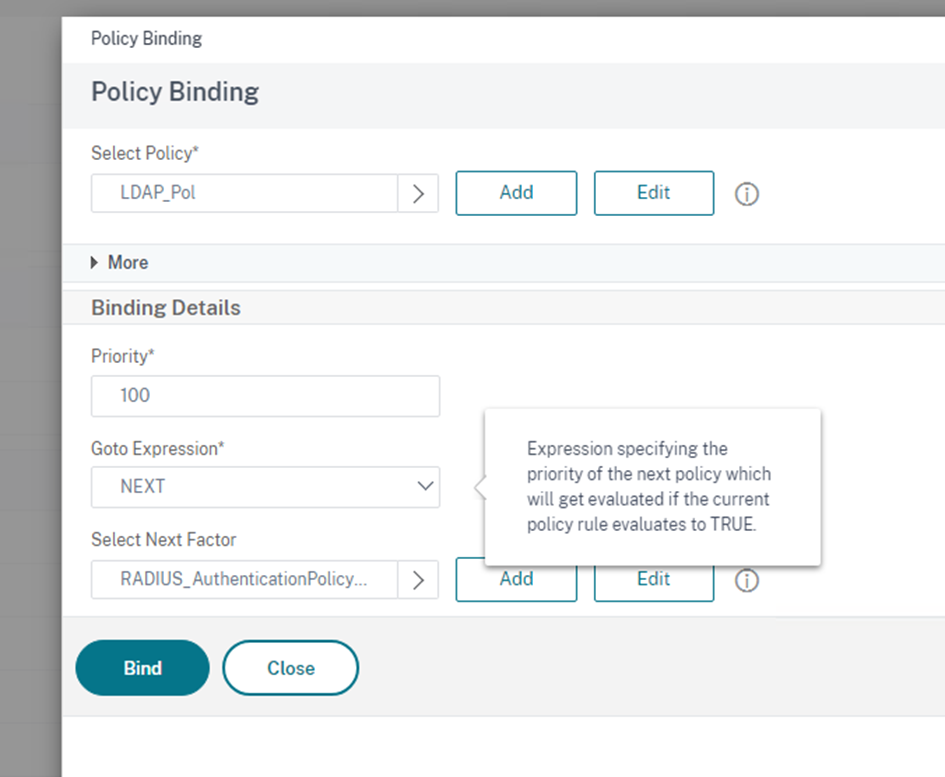
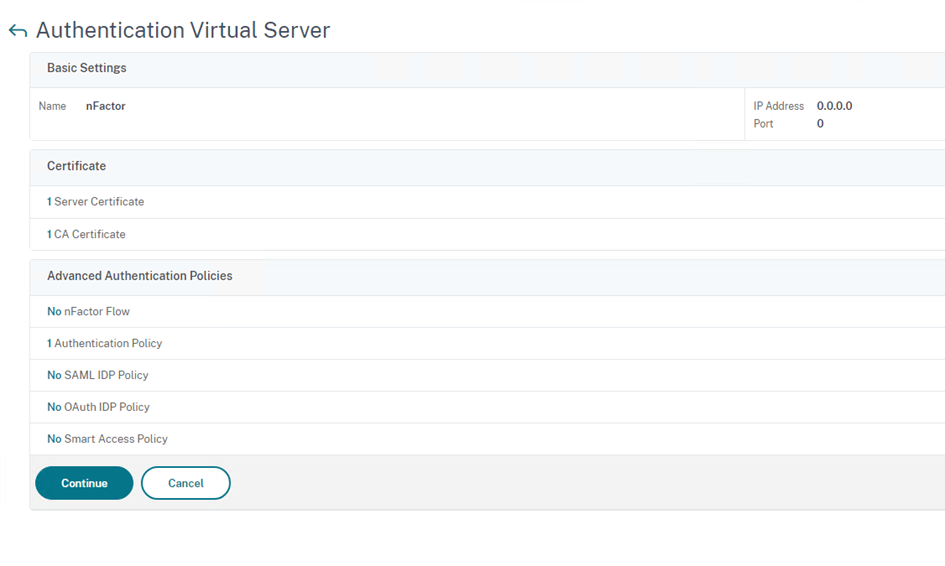
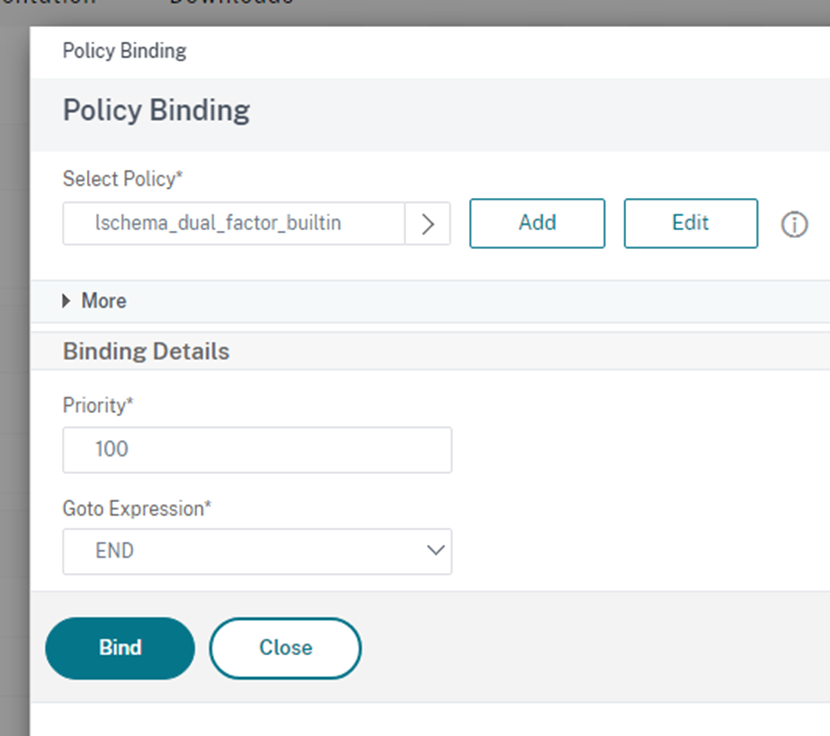
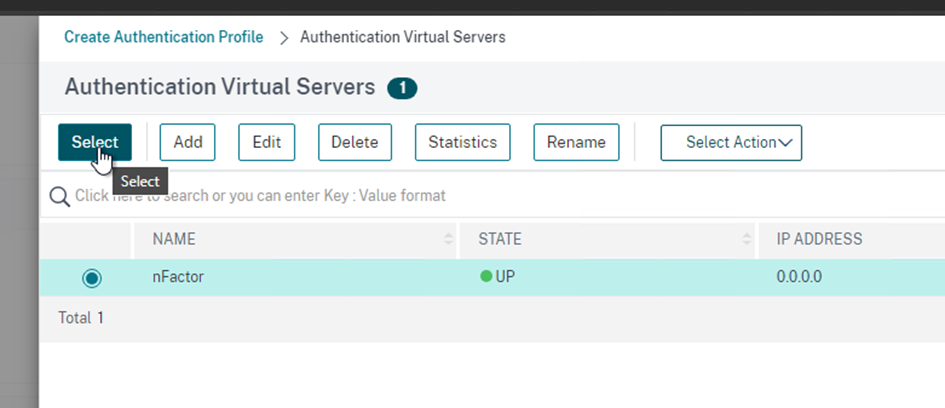
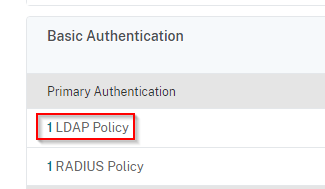
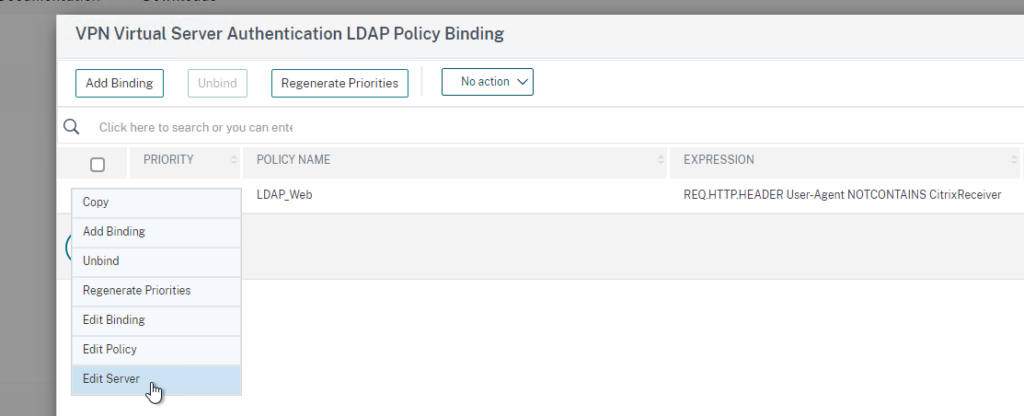
In Citrix Netscaler go to Citrix Gateway > Virtual Servers > Select the VIP > Primary Authentication > Select the LDAP Policy:
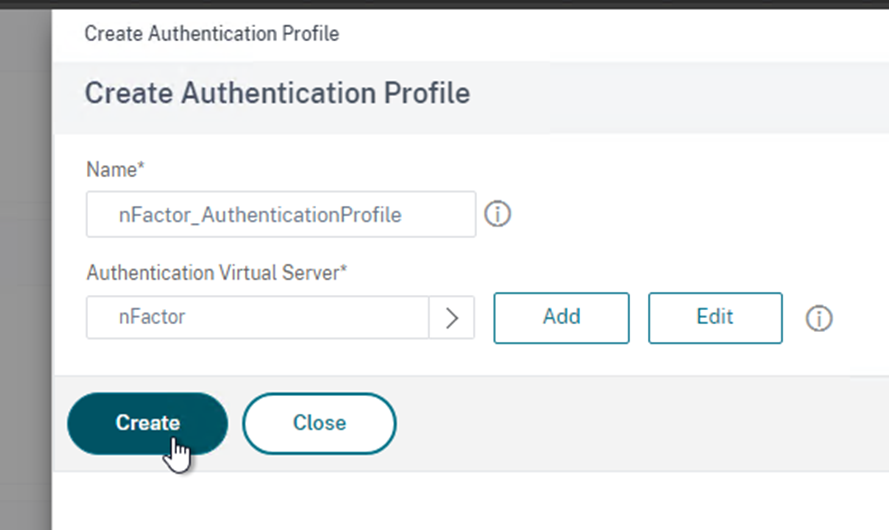
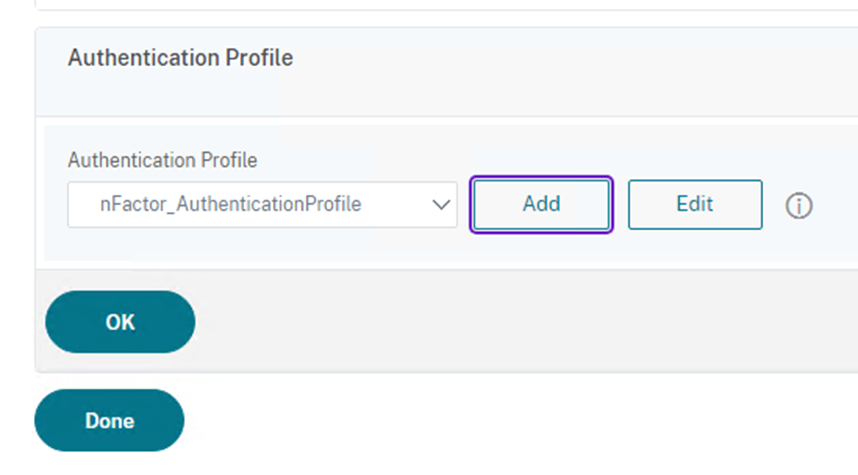
Edit Server
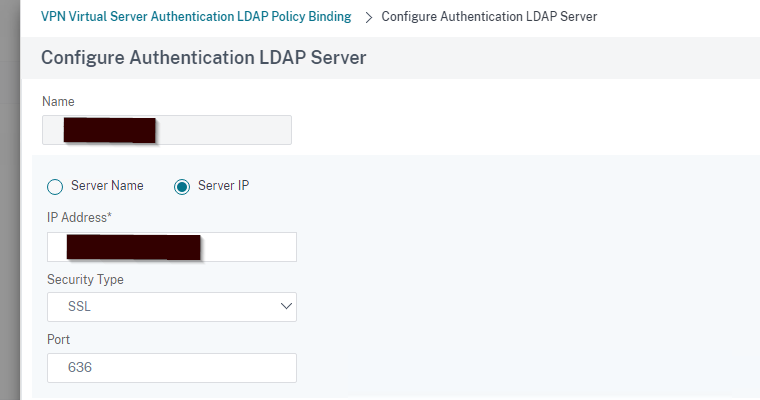
Select SSL under Security Type and Port 636
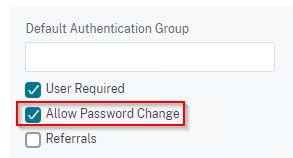
Further down, select Allow Password Change.
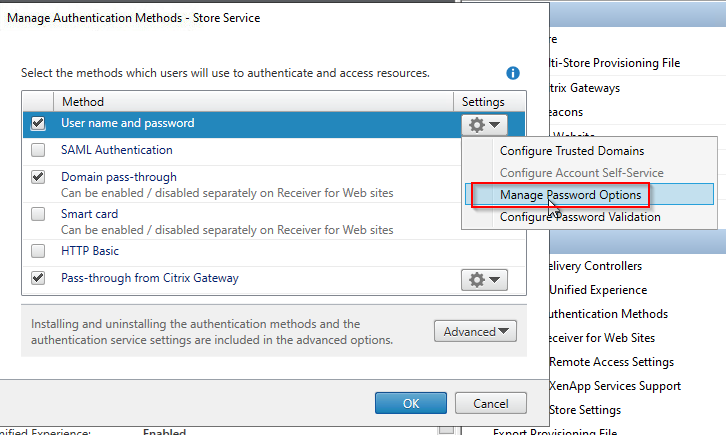
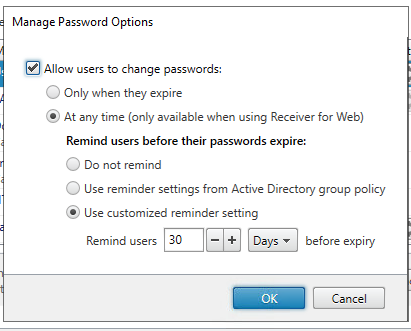
In Citrix Storefront, make sure Password Change is enabled:
The password reminder can also be enabled.
That’s it. Make sure your NetScaler Config is saved!
Having issues with users reconnecting a disconnected Citrix Virtual Apps and Desktops session? These keys might help you. Citrix support confirmed, that they help starting at Server 2016 VDA.
Fastreconnect is a feature that was introduced by Microsoft to enhance session reconnect through RDP, but through Citrix ICA it seems that is does not improve anything.