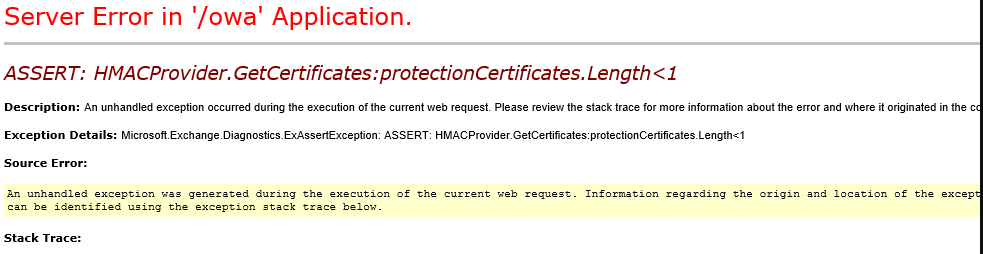
Home
Microsoft 365
Linux
Windows
Powershell
Cloud Computing
    Citrix Xendesktop
    Citrix XenApp
Useful links
About
  • Home
  • Microsoft 365
  • Linux
  • Windows
  • Powershell
  • Cloud Computing
    • Citrix Xendesktop
    • Citrix XenApp
  • Useful links
  • About
ajni.IT -
Cloud Computing•Microsoft 365•Windows Client OS

Automatic Outlook Profile creation with ZeroConfigExchange key

June 11, 2021 by AJNI No Comments

If you are syncing local AD users to Azure AD and using Seamless Sign-On (see https://www.ajni.it/2021/05/configuring-azure-ad-connect-for-user-synchronization/ and https://www.ajni.it/2021/05/configure-seamless-sign-on-for-microsoft-365-login-with-azure-ad-connect/), there is an awesome registry key that automatically creates the Outlook profiles without user interaction.

HKEY_CURRENT_USER\Software\Policies\Microsoft\Office\16.0\Outlook\AutoDiscover

DWORD ZeroConfigExchange 1

Alternatively, you can add the DWORD ZeroConfigExchangeOnce 1 key to automate the creation of the first profile. Successful profiles have to be created manually.

References:

https://docs.microsoft.com/en-us/outlook/troubleshoot/profiles-and-accounts/let-zeroconfigexchange-automatically-create-first-profile

Reading time: 1 min
Azure•Microsoft 365•Security•Windows Client OS•Windows Server

Configure Seamless Sign-On for Microsoft 365 Login with Azure AD Connect

May 28, 2021 by AJNI No Comments

When syncing local AD users to Azure AD, you can configure Seamless Sign-On to automatically login to Microsoft 365 Apps like Sharepoint Online, OneDrive, or Exchange Online. This is very easy to do and will make logins for users less painful.

Assuming Azure AD Connect is already set up with Pass-through authentication (see https://www.ajni.it/2021/05/configuring-azure-ad-connect-for-user-synchronization/), just open Azure AD Connect and then hit “change user sign-in” and log in with an Azure AD Global admin. After that, select “Enable single sign-on”.

Enter Domain Admin credentials.

When the pre-checks is complete, hit configure and exit.

A Computer Account named AZUREADSSOACC will be created in Active Directory which allows the authentication validation between Azure AD and local Active Directory. The Kerberos decryption key is saved in the cloud and should be changed regularly. You can see that on the Computer account, service principal names are configured

Lastly, you can roll out the feature with Group Policy. The URL https://autologon.microsoftazuread-sso.com must be added to the intranet zone list, which allows the browser to send Kerberos tickets to that site.

The GPO can be found under User Configuration > Policies > Administrative Templates > Windows Components > Internet Explorer > Internet Control Panel > Security Page > Site to Zone Assignment List.

Status bar updates via script must be also enabled. This GPO is located under User Configuration > Policies > Administrative Templates > Windows Components > Internet Explorer > Internet Control Panel > Security Page > Intranet Zone > Allow updates to status bar via script.

You can test the feature by opening portal.office.com. After entering the username, login should be done automatically without needing to insert a password.

References:

https://docs.microsoft.com/en-us/azure/active-directory/hybrid/how-to-connect-sso-quick-start

Reading time: 1 min
Azure•Cloud Computing•Microsoft 365•Windows Server

Configuring Azure AD Connect for user synchronization

May 22, 2021 by AJNI No Comments

The first step in the journey to the cloud is to install and configure Azure AD Connect. This will synchronize users in local Active Directory to Azure AD and will allow you to use cloud services like OneDrive For Business, Sharepoint Online, Exchange Online, or Microsoft Teams.

Before installing the service itself, we have to set an alternate UPN suffix as in Azure AD. In Active Directory Domains and Trusts add a new UPN suffix. The suffix should be equal to the custom domain name in Azure AD.

Users synchronizing to Azure AD should have that UPN suffix set:

In the Azure AD panel, select Azure AD Connect and then “Download Azure AD Connect”

Start the installer and select “Customize”

Hit install

Select Password Hash Synchronization and login with your Azure AD global admin

Select Create new AD Account and enter Enterprise Admin credentials. The tool will automatically set the correct permission on the OU without adding Domain Admin rights to the user.

You will notice that a new user named MSOL_xxx has been created.

This is just a warning. We already set the correct UPN suffix.

Deselect the top checkbox and select the OU containing AD Users. Service users should not be synchronized.

Leave everything else on default settings and then hit install.

With the synchronization service you can check what objects have been synced and the last time a sync ran.

In Azure AD the synced user should show up. You can see that the correct UPN has been configured on the user.

If you want to manually start AD Sync, in Windows PowerShell enter this command:

Start-ADSyncSyncCycle -PolicyType Delta

Reading time: 1 min
Citrix XenApp•Citrix Xendesktop•VDI•Windows Server

How to release Citrix Virtual Apps and Desktops Licenses

May 3, 2021 by AJNI No Comments

When using User/Device licensing in Citrix, licenses are occupied for up to 90 days, which is a long time if you have a limited amount of licenses. If you need to release them, here is how you can do it:

  • Stop the service Citrix Licensing Service, Citrix License Config Service and Citrix Support Service
  • Delete the following folder (or rename it, just to be sure): “C:\Program Files(x86)\Citrix\Licensing\LS\resource\cache”
  • Start the service Citrix Licensing Service, Citrix License Config Service and Citrix Support Service
  • Enjoy

References:

https://ulrikchristensen.com/how-to-release-unused-citrix-user-or-device-licenses/

Reading time: 1 min
Citrix XenApp•Windows Server

Fix Windows Update Coordinator stuck at “… preparing for the first use”

April 20, 2021 by AJNI No Comments

On a Windows Server with RDS feature enabled, you might encounter an issue with Windows Update Coordinator being stuck at “Please wait while the application is preparing for the first use” during a program installation. This problem is very easy to resolve with Group Policy Editor (either locally through gpedit.msc or Domain Group Policy).

Navigate to Computer configuration > Administrative Templates > Windows Components > Remote Desktop Services > Remote Desktop Session Host > Application Compatibility and enable the setting “Turn off Windows Installer RDS Compatibility”.

After installing the program, I would recommend re-enabling Windows Update Coordinator by disabling the GPO setting or leaving it at “Not configured”.

Reading time: 1 min
Page 14 of 21« First...10«13141516»20...Last »

Like what you are reading? Buy me a coffee.

Tip Of the Day

  • Add Alias to Windows Fileserver (Server 2019, 2022, 2025)

    1 day ago

Keep in touch

Oh hi there!
It’s nice to meet you.

Sign up to receive awesome content in your inbox, every month.

Check your inbox or spam folder to confirm your subscription.

Categories

  • AI & Deep Learning (1)
  • Azure (20)
  • Citrix XenApp (21)
  • Citrix Xendesktop (13)
  • Cloud Computing (40)
  • Coding (1)
  • Hyper-V (10)
  • Linux (8)
  • Microsoft 365 (26)
  • Powershell (21)
  • Security (7)
  • VDI (16)
  • Virtualization (21)
  • VMware (12)
  • Windows (21)
  • Windows Client OS (39)
  • Windows Server (92)

Archives

  • May 2025
  • April 2025
  • February 2025
  • January 2025
  • December 2024
  • November 2024
  • October 2024
  • September 2024
  • July 2024
  • June 2024
  • May 2024
  • April 2024
  • March 2024
  • February 2024
  • January 2024
  • December 2023
  • September 2023
  • August 2023
  • July 2023
  • June 2023
  • April 2023
  • March 2023
  • January 2023
  • December 2022
  • November 2022
  • October 2022
  • September 2022
  • August 2022
  • July 2022
  • June 2022
  • May 2022
  • February 2022
  • January 2022
  • December 2021
  • November 2021
  • October 2021
  • September 2021
  • August 2021
  • June 2021
  • May 2021
  • April 2021
  • March 2021
  • February 2021
  • December 2020
  • November 2020
  • September 2020
  • August 2020
  • July 2020
  • June 2020
  • May 2020
  • April 2020
  • March 2020
  • February 2020
  • November 2019
  • October 2019
  • September 2019
  • August 2019
  • July 2019
  • June 2019
  • May 2019
  • April 2019
  • March 2019

ajni IT © 2019