Home
Windows
    Windows Server
    Windows Client OS
Linux
Powershell
Virtualization
    VMware
    Hyper-V
Cloud Computing
    Citrix XenApp
    Citrix Xendesktop
Useful links
About
ajni.IT -
  • Home
  • Windows
    • Windows Server
    • Windows Client OS
  • Linux
  • Powershell
  • Virtualization
    • VMware
    • Hyper-V
  • Cloud Computing
    • Citrix XenApp
    • Citrix Xendesktop
  • Useful links
  • About

Linked Clones in VMware Workstation

July 13, 2020 by AJNI No Comments

A while ago I made a blog post about Differencing Disks in Hyper-V. If you mainly work with Hyper-V, you should check it out: https://www.ajni.it/2019/10/hyper-v-create-a-master-vhdx-to-save-tons-of-space/. VMware Workstation utilizes a similar concept, called Linked Clones.

Linked Clones use a read-only disk as a reference, changes made to the VM are written into a separate writable disk. This technique allows us to save disk space and create a lot of VMs. Changes, at least in the beginning after the OS installation, are very small.

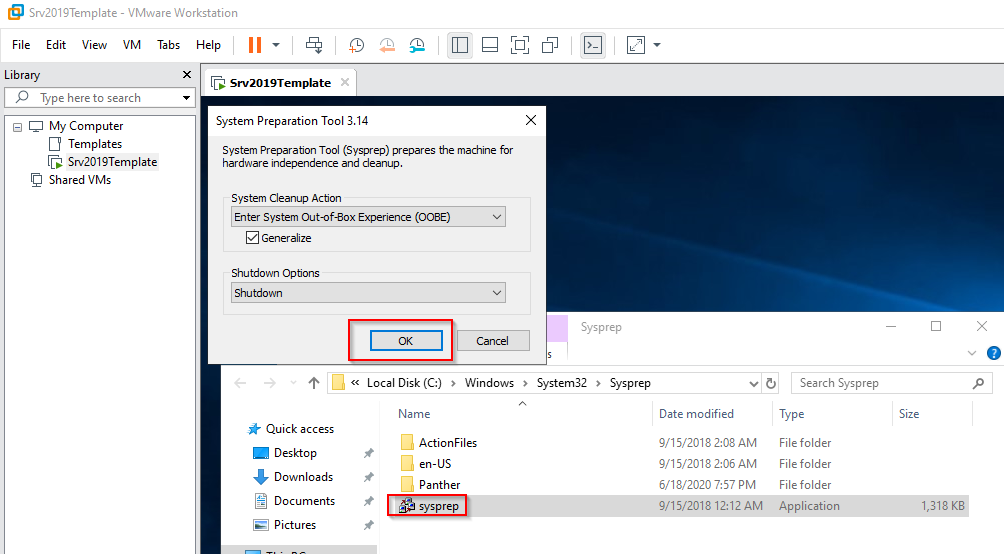
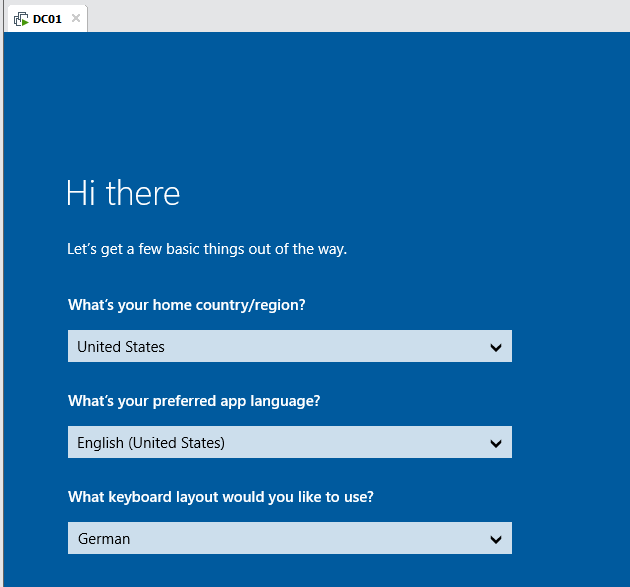
Install Windows 10 or Windows Server along with VMware Tools and then Sysprep your VM.
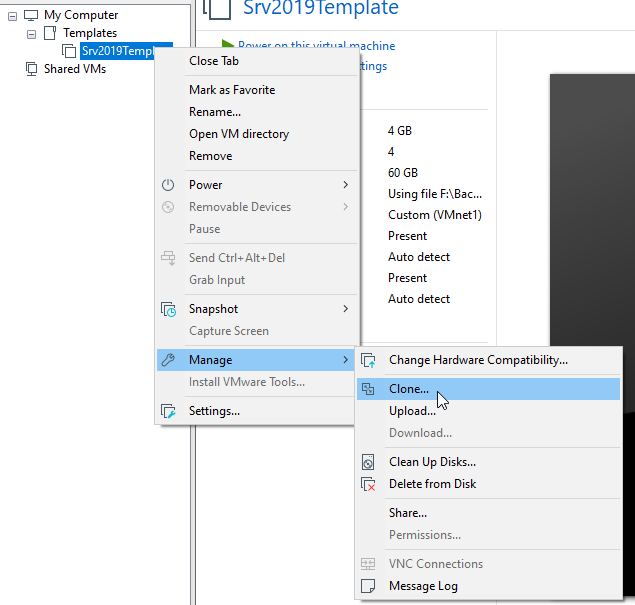
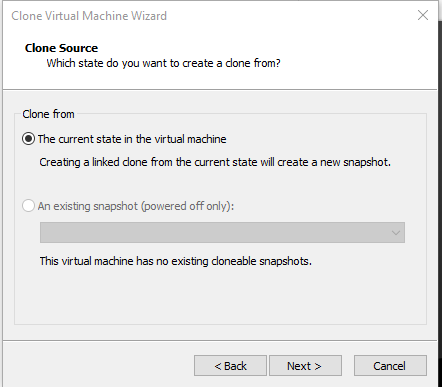
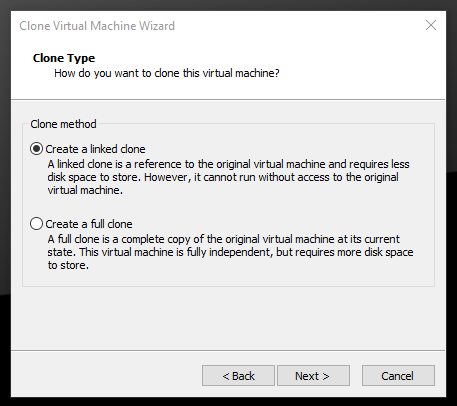
Now the template can be "cloned"

In VMware, a Differencing Disk is called Linked Clone. Just like in a snapshot, a linked clone uses a base read-only disk and saves changes into second, writable disk.

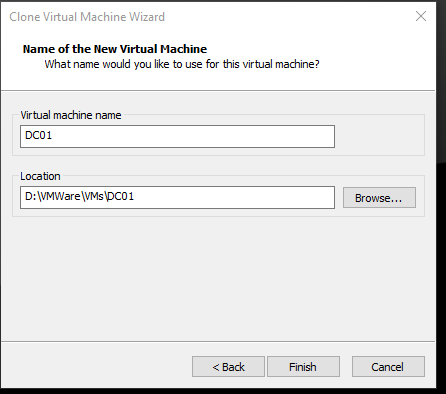
Now a name for the new VM can be inserted.

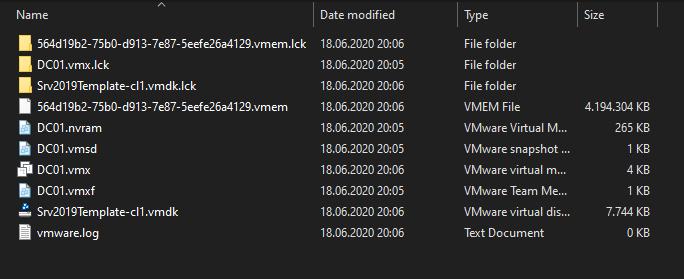
After booting up the new VM, we can see that the writable disk only consumes 7MB. 4GB are used for the memory state.

This feature is awesome for home labs. You can create multiple VMs off of that single base disk. In a lab, changes are usually very small, so you can save a ton of space using this method. I would not recommend updating your system through Windows Updates or enabling Bitlocker.

If for some reason the base disk is corrupt or lost though, every VM will be affected.

Reading time: 1 min

Powershell: Installing VMware PowerCLI

March 25, 2019 by AJNI No Comments

Hi Folks!

Here is a quick tip to install the VMware PowerCLI, which is - like the name says - for Windows PowerShell.

To initiate the installation process, type this command into the Powershell Console:

Install-Module -Name VMware.PowerCLI

Powershell will ask you if you wish to install "NuGet", which is required to automatically download and install VMware PowerCLI from PSGallery. You also have to trust the PSGallery repository in order to proceed with the installation.

Now you can list all of the VMware PowerCLI Modules:

Get-Module -ListAvailable | where { $_.Name -match "vmware" }

Or just check your currently installed VMware PowerCLI version:

Get-PowerCLIVersion

Enjoy!

Reading time: 1 min

Tip Of the Day

  • Delete or rename a folder with a blank space at the end

    4 weeks ago

Recent Posts

  • Microsoft AlwaysOn VPN Deployment
  • Delete or rename a folder with a blank space at the end
  • Automatic program start at logon with GPOs
  • Reset Computer Secure Channel of a Domain Computer with one PowerShell command
  • Let Outlook connect to Exchange Online instead of Exchange On-Prem

Categories

  • Azure (5)
  • Citrix XenApp (6)
  • Citrix Xendesktop (4)
  • Cloud Computing (18)
  • Coding (1)
  • Hyper-V (5)
  • Linux (8)
  • Powershell (8)
  • Security (2)
  • VDI (4)
  • Virtualization (12)
  • VMware (5)
  • Windows (16)
  • Windows Client OS (14)
  • Windows Server (23)

Archives

  • December 2020
  • November 2020
  • September 2020
  • August 2020
  • July 2020
  • June 2020
  • May 2020
  • April 2020
  • March 2020
  • February 2020
  • November 2019
  • October 2019
  • September 2019
  • August 2019
  • July 2019
  • June 2019
  • May 2019
  • April 2019
  • March 2019

ajni IT © 2019