Home
Microsoft 365
Linux
Windows
Powershell
Cloud Computing
    Citrix Xendesktop
    Citrix XenApp
Useful links
About
  • Home
  • Microsoft 365
  • Linux
  • Windows
  • Powershell
  • Cloud Computing
    • Citrix Xendesktop
    • Citrix XenApp
  • Useful links
  • About
ajni.IT -
Windows Server

Microsoft AlwaysOn VPN Deployment

December 31, 2020 by AJNI No Comments

For a Microsoft AlwaysOn VPN Deployment, the following services must run in your domain:

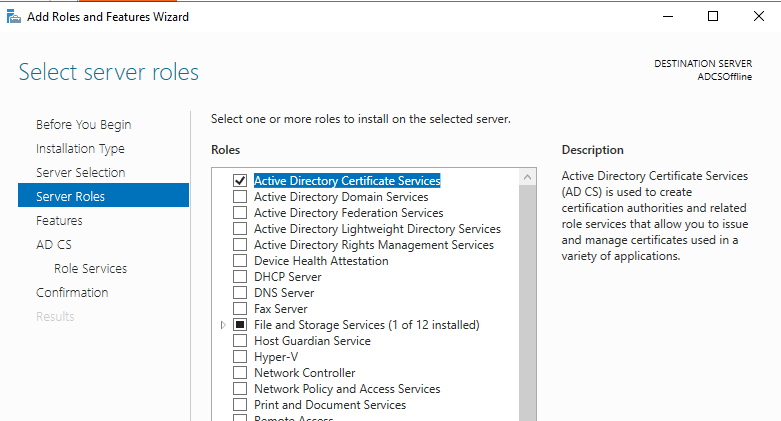
  • A Public Key Infrastructure (PKI) – Active Directory Certificate Services
  • A Microsoft Network Policy (NPS)/Radius Server
  • A Routing and Remote Access Server

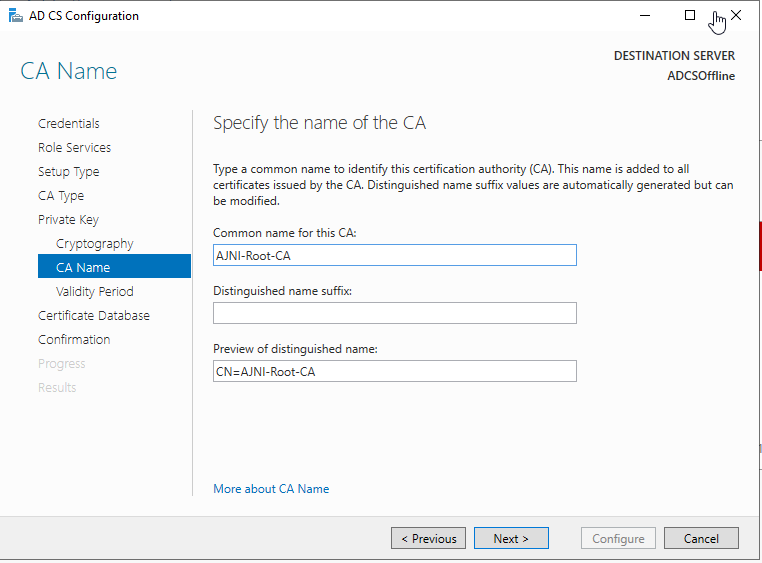
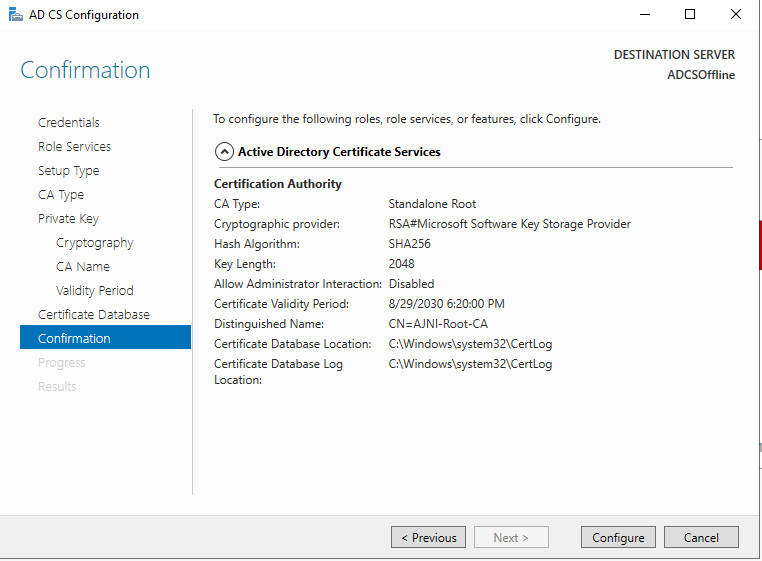
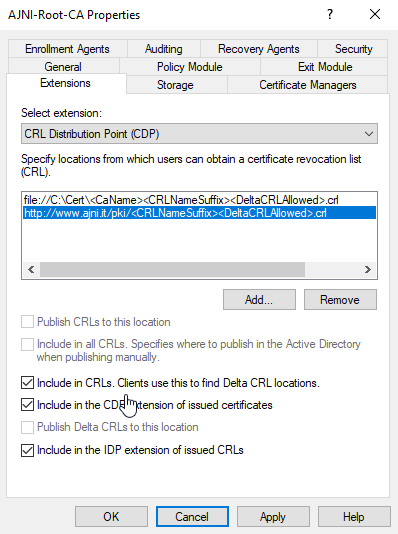
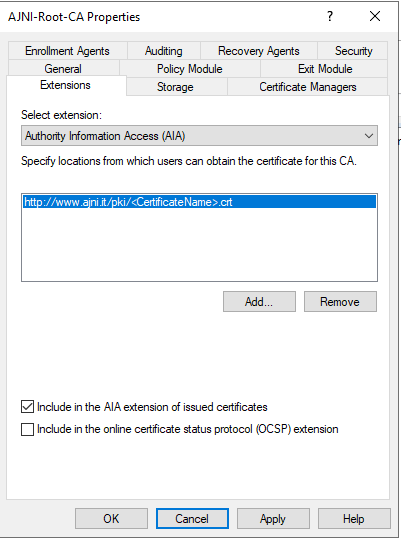
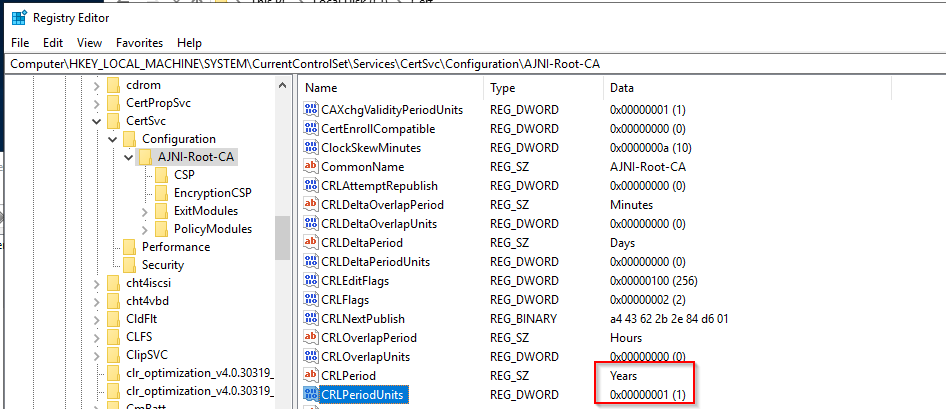
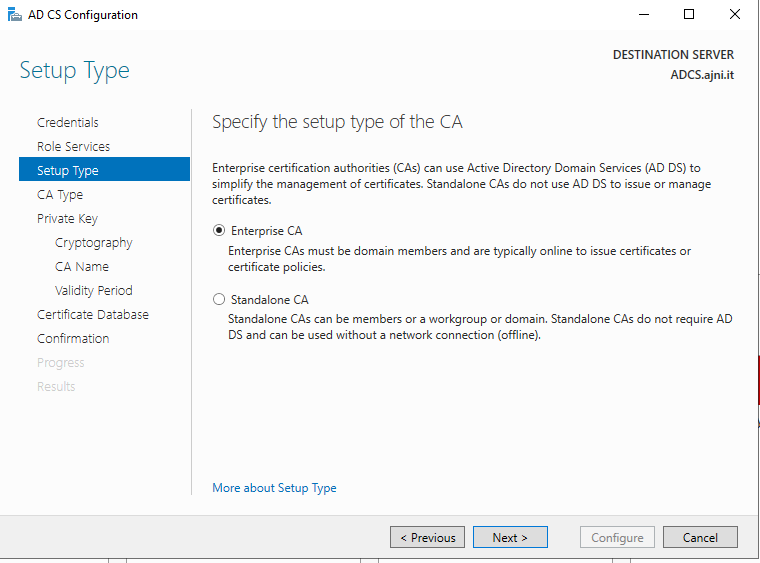
If you need to set up your PKI, check out this blog post I made a while ago: https://www.ajni.it/2020/08/active-directory-certificate-services-ad-cs-on-windows-server-2019/

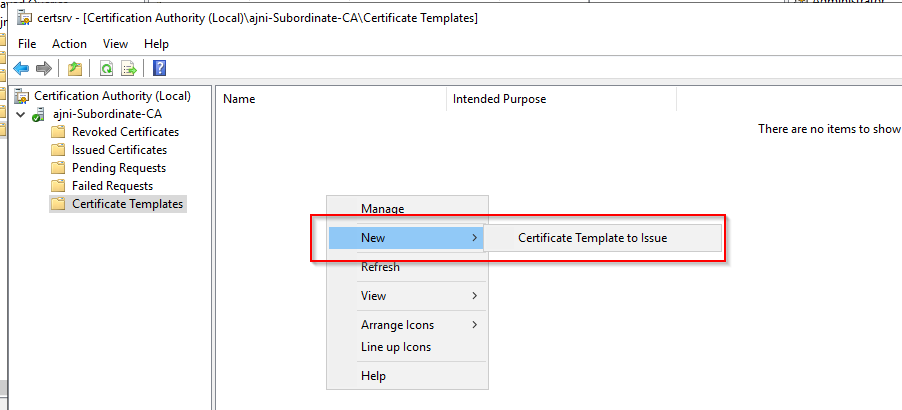
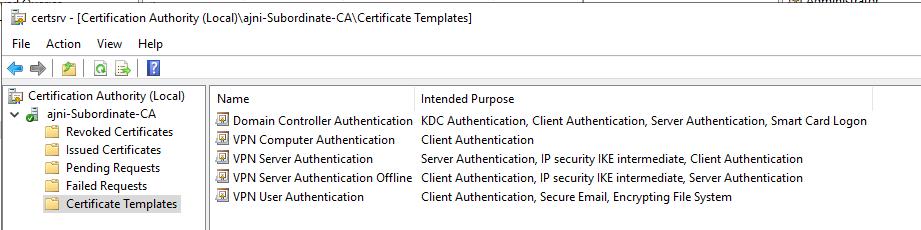
Here are the ADCS Templates needed for the deployment:

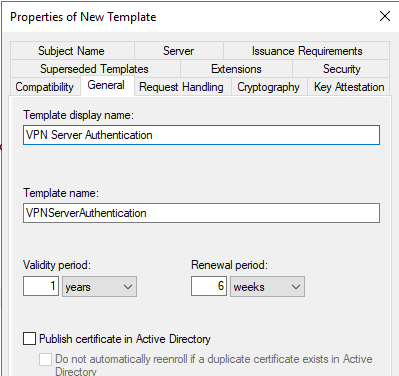
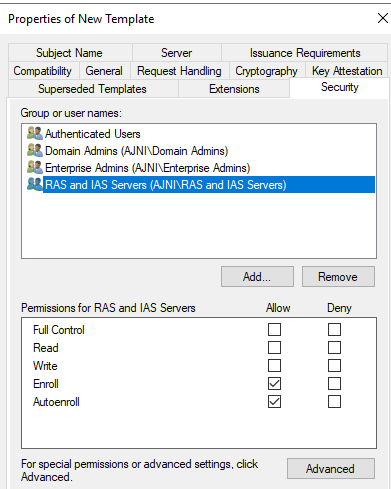
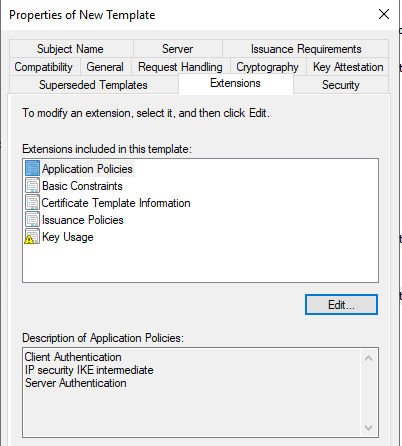
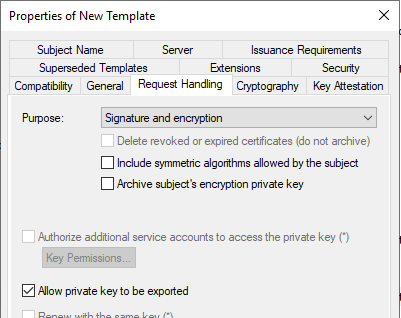
VPN Server Authentication

Make sure you leave Authenticated Users. Add Autoenroll to Ras and IAS Servers.

In Application Policies, Add IP Security IKE Intermediate

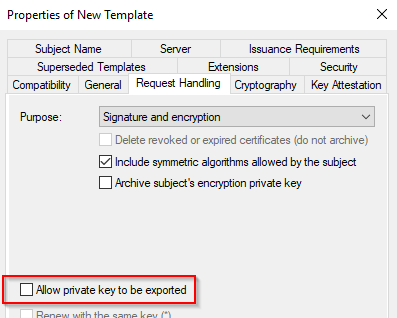
Allow the private key to be exported.

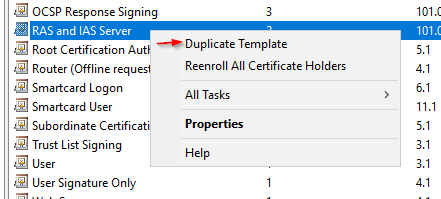
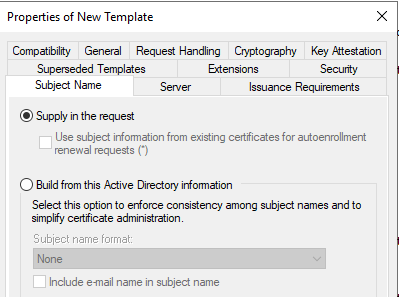
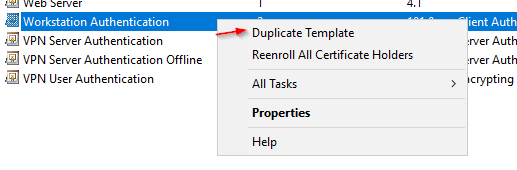
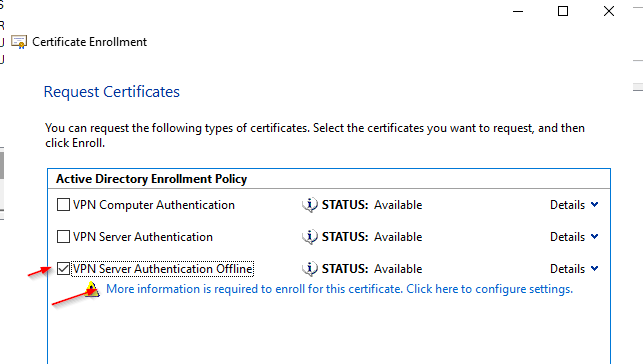
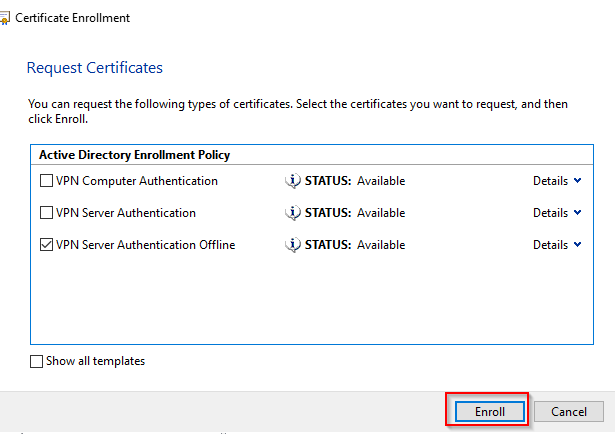
VPN Authentication Offline (Make a duplicate of the template that you just created)

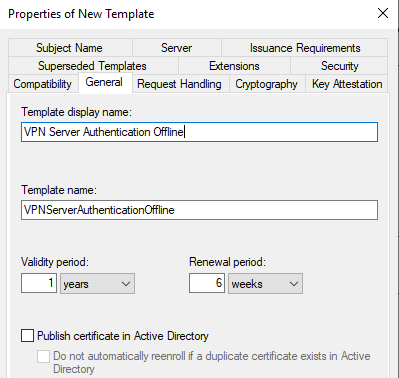
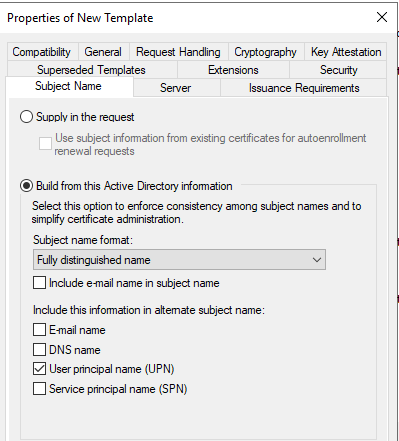
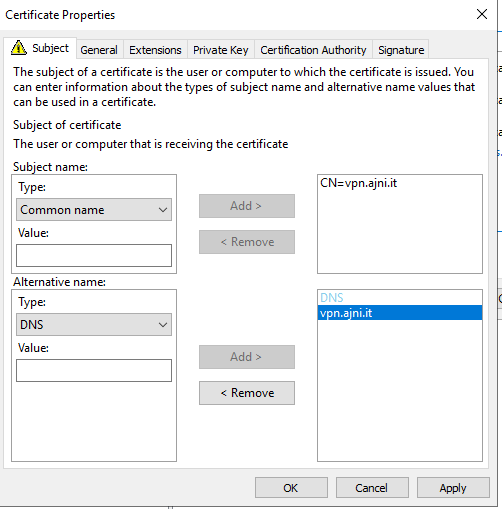
Subject Name – Supply in the request

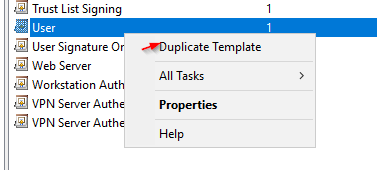
VPN User Authentication

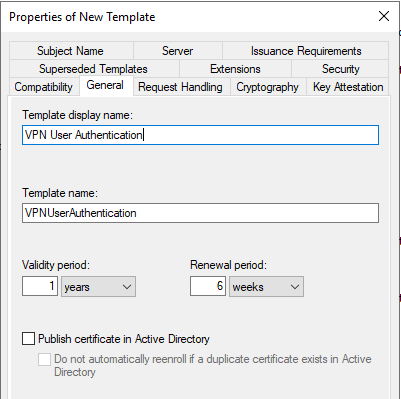
Add the group that will contain the VPN Users

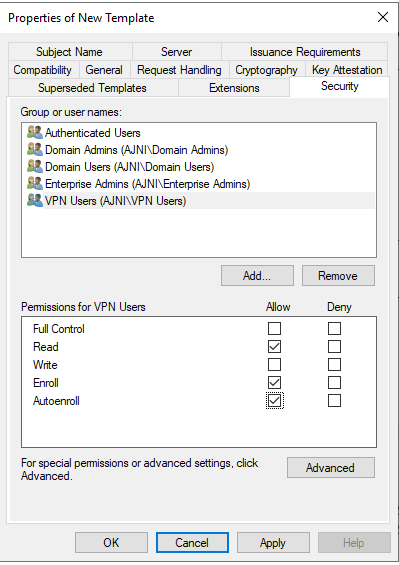
Do not make the key exportable.

You might not need the Microsoft Software Key Storage Provider. If you test the client side on a VM though, the user will not be able to obtain the certificate, because the client computer needs a TPM chip. By selecting the Software Key Storage Provider a certificate is still obtainable.

Next, VPN Computer Authentication

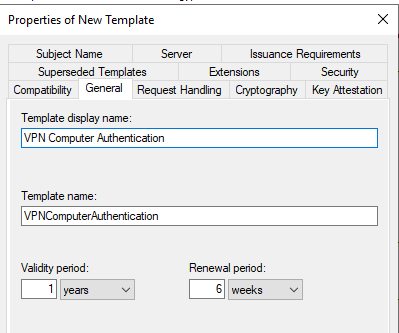
Add the group containing the VPN Computers. Computers will use a device tunnel and have access to the Domain Controllers and PKI infrastructure.

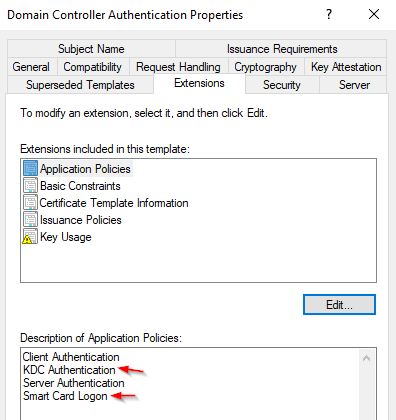
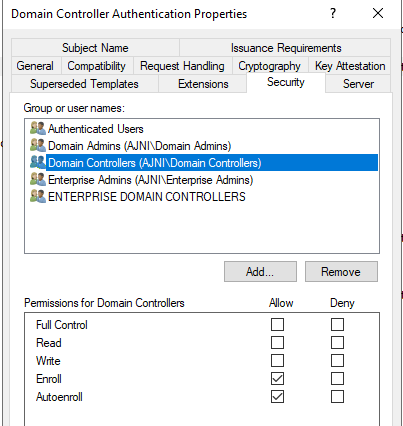
Edit the existing template Domain Controller Authentication. Make sure that KDC Authentication and Smart Card Logon is added.

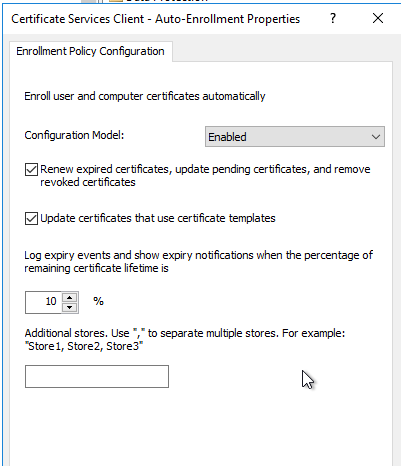
Auto enrollment should be active. Just double check.

Add the templates that were just created.

If there is no GPO for Certificate Auto Enrollment, create one at the top of the Domain on the User and Computer Level (Policies > Windows Settings > Security Settings > Public Key Policies > Certificate Services Client – Auto Enrollment):

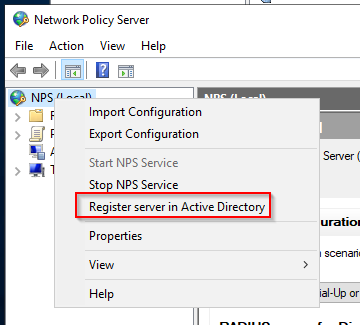
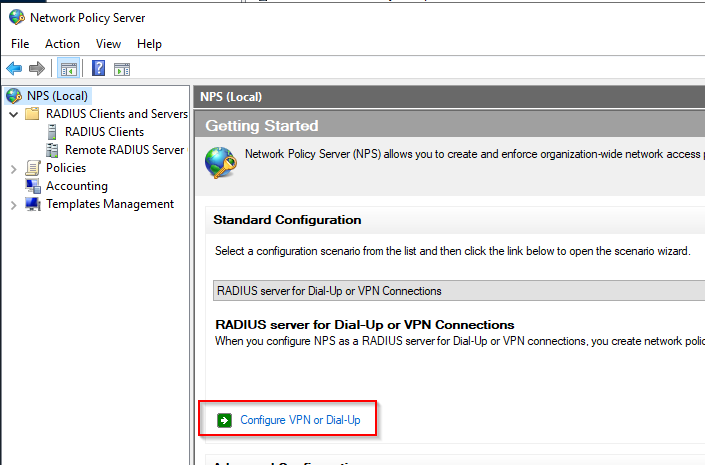
Now, let’s configure the NPS server. Just install the feature through Server Manager (I skipped that part here).

Register the server in Active Directory.

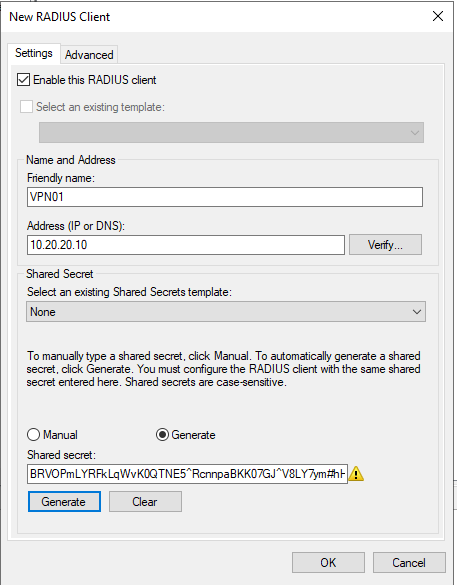
Add a new Radius Client (which will be the RRAS Server outside of the Domain, in a DMZ network). Save the Shared secret externally. It will be added to the VPN server as well.

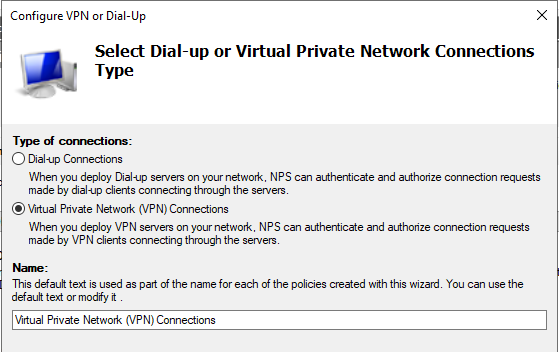
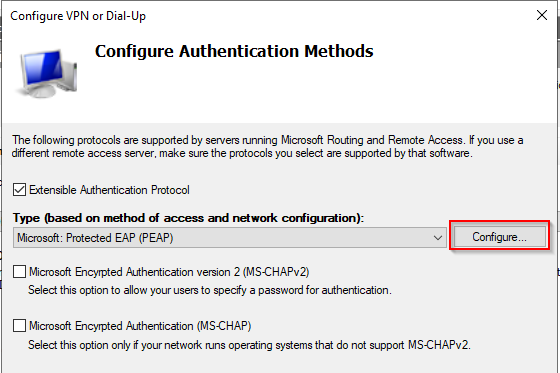
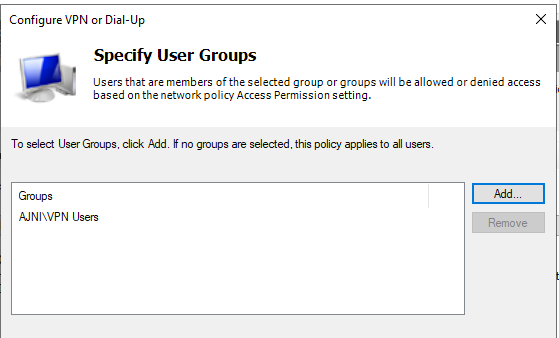
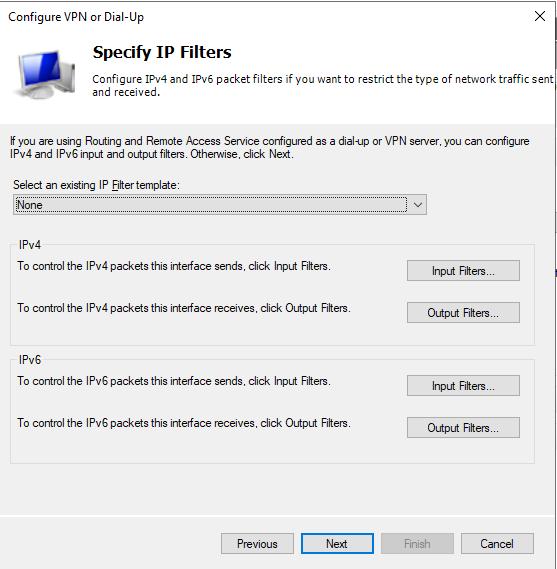
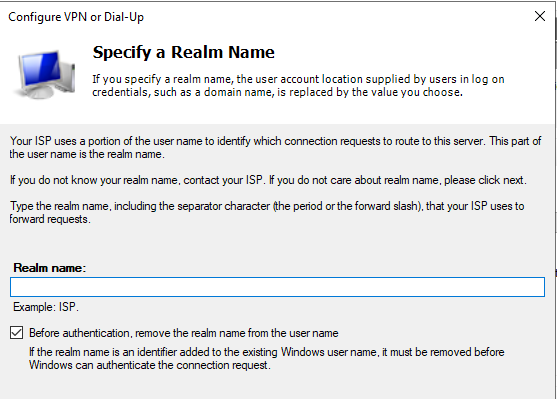
Configure VPN or Dial-Up

The Radius Client we just added should be listed.

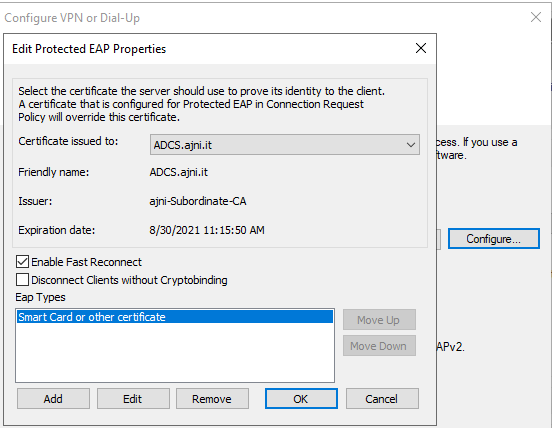
Don’t change anything here

Once again don’t change anything
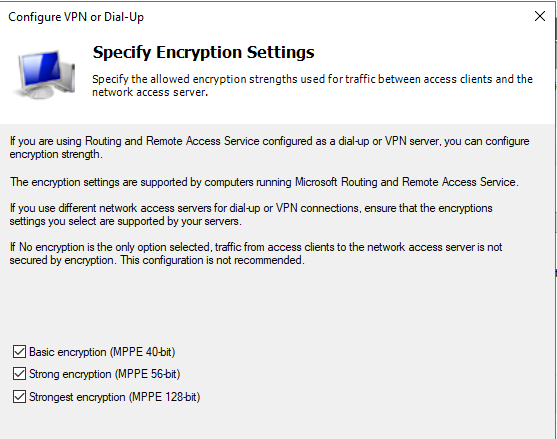
Leave it as is.

You might need the Windows Firewall Rules:

New-NetFirewallRule -DisplayName “RADIUS 1645 (UDP) – Inbound” -Direction Inbound -LocalPort 1645 -Protocol UDP -Action Allow

New-NetFirewallRule -DisplayName “RADIUS 1646 (UDP) – Inbound” -Direction Inbound -LocalPort 1646 -Protocol UDP -Action Allow

New-NetFirewallRule -DisplayName “RADIUS 1812 (UDP) – Inbound” -Direction Inbound -LocalPort 1812 -Protocol UDP -Action Allow

New-NetFirewallRule -DisplayName “RADIUS 1813 (UDP) – Inbound” -Direction Inbound -LocalPort 1813 -Protocol UDP -Action Allow

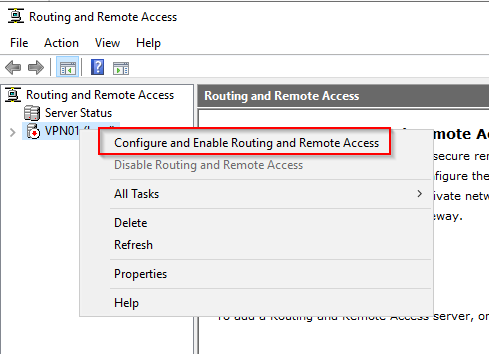
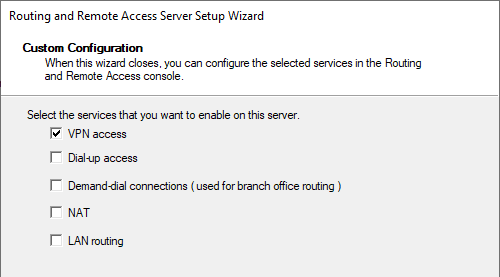
Configuring the RRAS server (in a DMZ network)

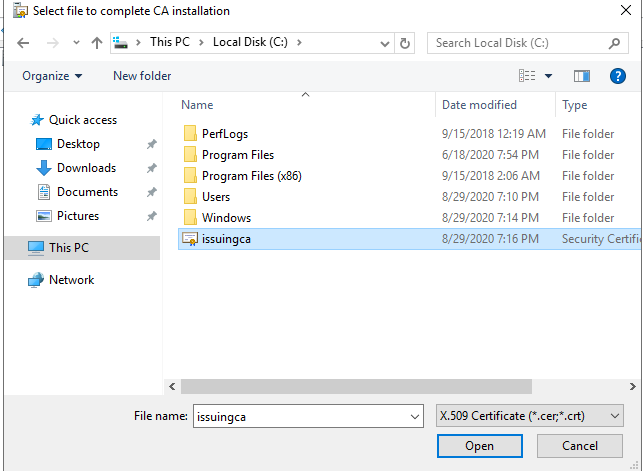
First, request a certificate on a Domain Computer. This certificate will be used on the RRAS Server.

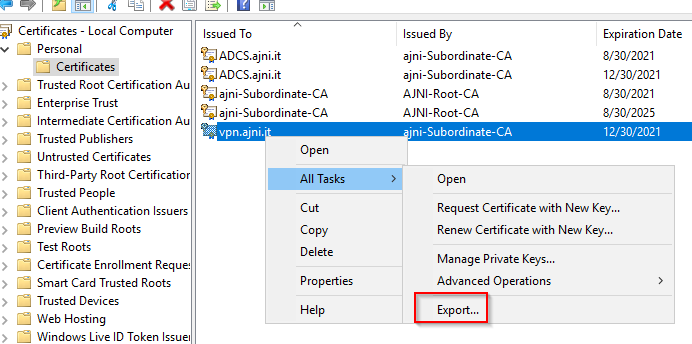
Now export the certificate with the private key

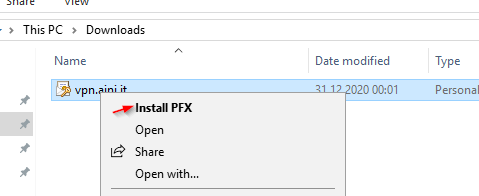
… and import it on the RRAS server.

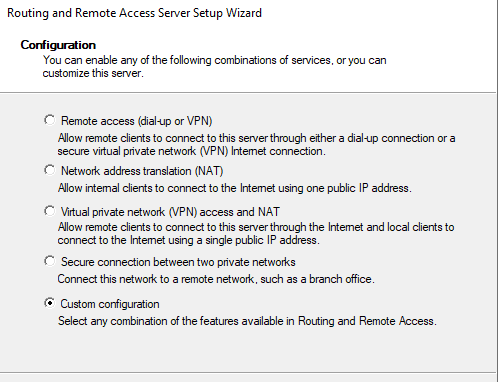
Install the RRAS Feature

Install-WindowsFeature DirectAccess-VPN -IncludeManagementTools

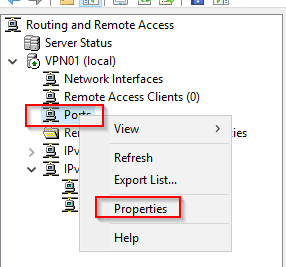
Open the Routing and Remote Access Console

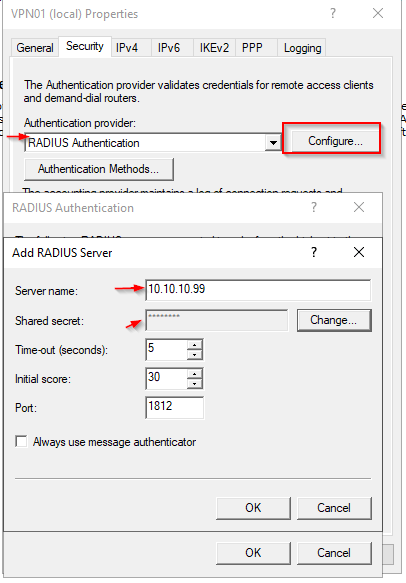
Open the properties of the server > Security. Set the Shared secret that was automatically generated on the Radius server. Insert the IP of the Radius server. Communication is done through Port 1812 UDP.

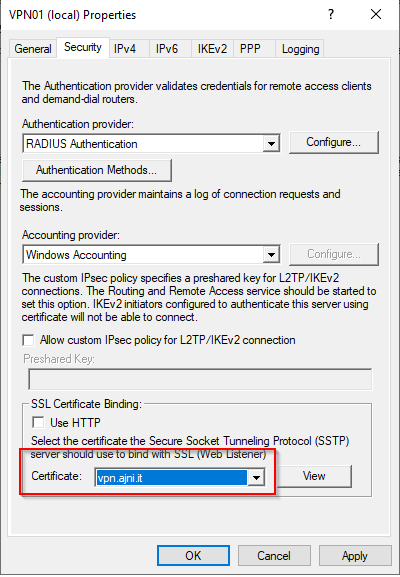
Select the imported certificate.

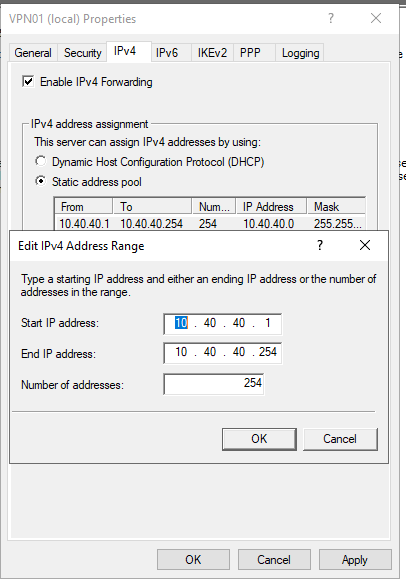
Under IPv4 specify the VPN clients network settings.

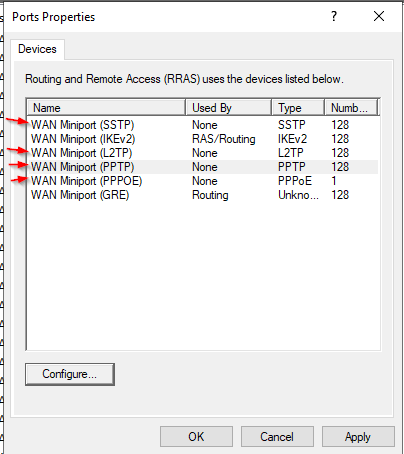
Disable the unused Ports.

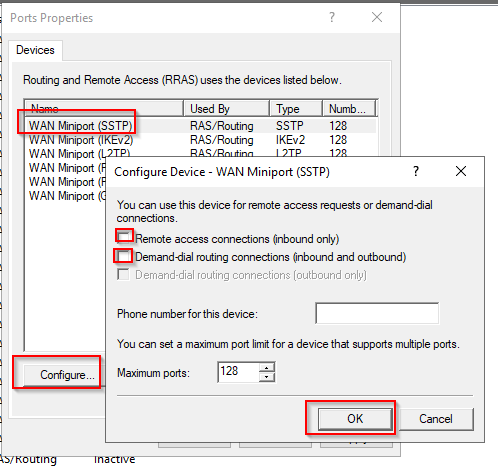
Same thing for Wan Miniport L2TP, PPTP and PPOE

To allow the device tunnel, run these PowerShell commands. The device will not be authenticated by the NPS server, instead the RRAS server will validate if the certificate is valid and issued by the Certificate Authority that we trust.

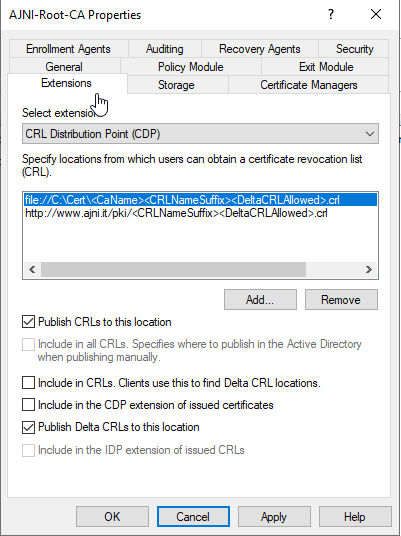
$VPNRootCertAuthority = “AJNI-Root-CA” 

$RootCACert = (Get-ChildItem -Path cert:LocalMachine\root | Where-Object {$_.Subject -Like “*$VPNRootCertAuthority*”}) 

Set-VpnAuthProtocol -UserAuthProtocolAccepted Certificate, EAP -RootCertificateNameToAccept $RootCACert -PassThru 

Ports 4500 and 500 UDP must be reachable from the internet. The NAT rule should point to the VPN server.

To deploy the user and device tunnel check out the references at the end. Both scripts must be executed as SYSTEM user. I used Task Scheduler to execute the PowerShell scripts as SYSTEM.

If you need help, let me know. It is fairly straight forward, but you should take your time and thoroughly read the documents before testing.

References:

http://blog.tofte-it.dk/tutorial-deploy-always-on-vpn/

https://directaccess.richardhicks.com/2017/12/11/always-on-vpn-windows-10-device-tunnel-step-by-step-configuration-using-powershell/

https://docs.microsoft.com/en-us/windows-server/remote/remote-access/vpn/always-on-vpn/deploy/vpn-deploy-client-vpn-connections

Reading time: 3 min
Hyper-V•Virtualization•VMware•Windows Server

Active Directory Certificate Services (AD CS) on Windows Server 2019

August 30, 2020 by AJNI No Comments

Active Directory Certificate Services is the Windows implementation of Public Key Encryption (PKI). ADCS is needed whenever you are hosting a web server that needs to encrypt data over the wire. Instead of buying a public certificate, you implement your own trusted internal Certificate Authority (CA), deploy the Root Certificate to your clients through GPO, and then you can create as many web server certificates as you want.

My deployment consists of two servers with Windows Server 2019. The first server will be the Offline Root Certificate Authority (offline because it will be offline for most of the time) and will not be part of the domain. The second server will be a domain member and will be the Issuing CA.

So on the first server, install the ADCS role on the Workgroup server in Server Manager:

Under Role Services, select Certification Authority.

After the role installation, proceed with the configuration.

This server will be the Standalone Root CA, the domain member will be an Enterprise Subordinate CA.

Create a new private key. SHA256 should be just fine for the hash algorithm with a key length of 2048.

Give the CA a name.

The offline Root CA should be valid for 10 years. The online CA for 5.

Here a recap of the settings we chose.

Before configuring the second server, let’s change the Authority Information Access (AIA) and the CRL Distribution Point (CDP). These must be reachable by clients at any time. Open the properties and head to extensions. Remove all the distribution points on the CDP and create these ones (I am not sure if IDP is needed, please let me know):

http://www.ajni.it/pki/<CaName>.crt

Change the validity period of the Subordinate CA certificate we are just going to issue and the CDP (5 years for the Subordinate CA and one year for the CDP):

HKEY_LOCAL_MACHINE\SYSTEM\CurrentControlSet\Services\CertSvc\Configuration\AJNI-Root-CA

Now let’s install and configure the second online CA server. The feature installation wizard is the same as on the first server. The configuration is slightly different.

Like previously mentioned, we are using an Enterprise Subordinate CA.

We are creating a new key. The hash algorithm is also SHA256 with a key size of 2048.

The certificate request will be uploaded to first server and digitally signed by the offline Root CA.

Here is once again the summary of all configured settings.

Now upload the certificate request file to the first CA. Open the Certification Authority MMC on the first server and submit a new request.

Under Pending Request you should see your request (it might take a few seconds). Here you can issue the certificate.

Save the signed certificate to a file as a DER format. Also, copy the Root certificate to the second server and install it in the local certificate store.

On the online CA, start the ADCS service and install the signed certificate from the offline CA.

Select the previously saved file.

You will probably get an error when attempting to start the service because the CDP is not reachable (http://www.ajni.it/pki/…). With pkiview.msc, you can check if the distribution point are reachable and up-to-date:

Now you will need a webserver where these files are going to be hosted. I will install IIS on the same server, but it is highly recommended to host it on a separate server.

Change IIS configuration to respond to requests with the DNS name www.ajni.it:

Create a DNS entry pointing to the server:

Create the CRL file on the offline Root CA and copy them to the IIS root folder (in my case it’s C:\inetpub\wwwroot\pki):

The file will be created under C:\cert. We’ll also need the Root CA file. The file name needs to be Ajni-Root-CA.crt though.

Here the file inside the IIS folder:

On pkiview.msc, everything should be green on the Ajni-Root-CA. When dealing with Delta CRL, IIS might block downloads because of double escaping. To solve that allow double escaping on IIS under Request Filtering:

Now that the CDP is reachable, the Subordinate CA can be started without any issues. Like on the Root CA, we have to change CDP and AIA locations:

file://C:\inetpub\wwwroot\pki\<CaName><CRLNameSuffix><DeltaCRLAllowed>.crl

http://www.ajni.it/pki/<CaName><CRLNameSuffix><DeltaCRLAllowed>.crl

With the above configuration, CRL and delta CRL will be automatically published to the IIS root folder.

Publish the first CRL manually (you need to revoke one certificate, otherwise, the list will not be created. Do that through certlm.msc). Afterward, everything should be green in pkiview.msc.

Publish both CRL and Delta CRL.

The files should be created inside C:\inetpub\wwwroot\pki. The Subordinate CA certificate has to be copied manually and named properly. You can ignore the fact that I have 2 Subordinate CA certificates. You should only see one.

Pkiview.msc is also happy:

After everything is set, you can shut down the offline CA. You only have to start it once a year when publishing the CRL.

At last, publish the Root certificate in Active Directory with certutil. This can be also achieved with GPO.

certutil.exe -f -dspublish AJNI-Root-CA.crt RootCA

Reading time: 4 min

Like what you are reading? Buy me a coffee.

Tip Of the Day

  • Add Alias to Windows Fileserver (Server 2019, 2022, 2025)

    5 days ago

Keep in touch

Oh hi there!
It’s nice to meet you.

Sign up to receive awesome content in your inbox, every month.

Check your inbox or spam folder to confirm your subscription.

Categories

  • AI & Deep Learning (1)
  • Azure (20)
  • Citrix XenApp (21)
  • Citrix Xendesktop (13)
  • Cloud Computing (40)
  • Coding (1)
  • Hyper-V (10)
  • Linux (8)
  • Microsoft 365 (26)
  • Powershell (21)
  • Security (7)
  • VDI (16)
  • Virtualization (21)
  • VMware (12)
  • Windows (21)
  • Windows Client OS (39)
  • Windows Server (92)

Archives

  • May 2025
  • April 2025
  • February 2025
  • January 2025
  • December 2024
  • November 2024
  • October 2024
  • September 2024
  • July 2024
  • June 2024
  • May 2024
  • April 2024
  • March 2024
  • February 2024
  • January 2024
  • December 2023
  • September 2023
  • August 2023
  • July 2023
  • June 2023
  • April 2023
  • March 2023
  • January 2023
  • December 2022
  • November 2022
  • October 2022
  • September 2022
  • August 2022
  • July 2022
  • June 2022
  • May 2022
  • February 2022
  • January 2022
  • December 2021
  • November 2021
  • October 2021
  • September 2021
  • August 2021
  • June 2021
  • May 2021
  • April 2021
  • March 2021
  • February 2021
  • December 2020
  • November 2020
  • September 2020
  • August 2020
  • July 2020
  • June 2020
  • May 2020
  • April 2020
  • March 2020
  • February 2020
  • November 2019
  • October 2019
  • September 2019
  • August 2019
  • July 2019
  • June 2019
  • May 2019
  • April 2019
  • March 2019

ajni IT © 2019