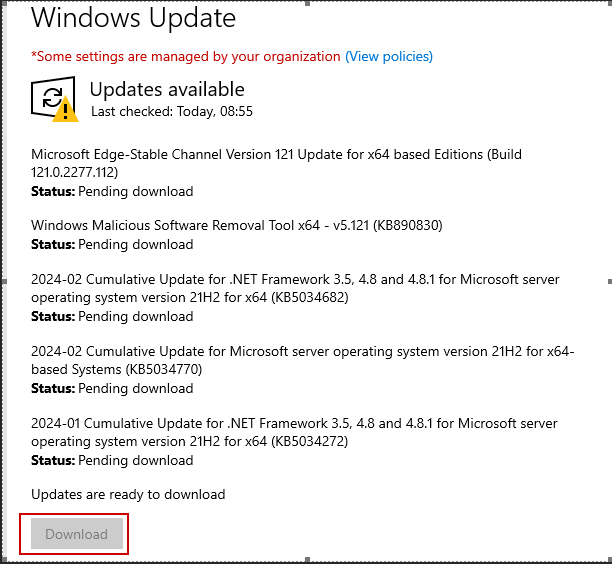
Home
Windows
    Windows Server
    Windows Client OS
Linux
Powershell
Virtualization
    VMware
    Hyper-V
Cloud Computing
    Citrix XenApp
    Citrix Xendesktop
Useful links
About
ajni.IT -
  • Home
  • Windows
    • Windows Server
    • Windows Client OS
  • Linux
  • Powershell
  • Virtualization
    • VMware
    • Hyper-V
  • Cloud Computing
    • Citrix XenApp
    • Citrix Xendesktop
  • Useful links
  • About

Add a second Server 2019 Core Domain Controller in the Domain

July 6, 2020 by AJNI No Comments

Server Core Edition is very lightweight, needs less Windows Updates, less disk space, and should be used whenever possible. Basic features like AD DS, DNS, DHCP, or IIS are supported on Server Core. Administering is also very easy once it is a member of the domain because it can be added to Server Manager on a server with GUI. We are installing AD DS in this article.

You can relatively easily change system settings on Server Core with the sconfig cmd tool.

sconfig

First change the server's name (Option 2).

Afterwards set the IP address to a static one along with DNS servers (option 8).

Return to the main menu and perform the Domain Join (option 1).

We don't need to change the computer name. The server will be then rebooted.

From now on, the fastest and simplest approach of administering your Windows Server Core is through Server Manager on a Server with GUI.

Add Roles and Features and promote the server to a Domain Controller. These steps are very straightforward. Some screenshots might be missing. If you want the step by step instructions, check out this post https://www.ajni.it/2019/10/server-2019-installing-your-first-domain-controller-in-a-new-domain/.

You can double check in Active Directory Users and Computers and Active Directory Sites and Services.

NTDS settings might not be created right away. Don't panic, this might take some time. You shouldn't create the entries manually.

Reading time: 1 min

Citrix Virtual Apps and Desktops 1912 LTSR Installation

June 1, 2020 by AJNI No Comments

What do we need for a Citrix Virtual Apps and Desktops (XenApp and XenDesktop) deployment?

  • Active Directory
  • Citrix Delivery Controller
  • Citrix Storefront
  • One Citrix Virtual Delivery Agent (VDA)
  • Citrix License Server
  • A Database Server (SQL Server)

I will be consolidating Citrix Delivery Controller, Storefront, and License Server into one VM since this is a lab environment. In a production environment, you would use 2 VMs for Citrix Delivery Controller (for High Availability – HA), two for Citrix Storefront, and one for the License Server. The VDA count depends on user size.

Using the same two VMs for Delivery Controller and Storefront is also viable.

In my lab, all the servers are housing Windows Server 2019 Datacenter.

First, download the ISO on citrix.com. You will need an account and if you don’t have any partnership with Citrix, it is very difficult to get those files. There is a form you can fill and all you can do afterward is hope that they give you the files. Otherwise, there is no way of getting them publicly.

After mounting the ISO Autoselect.exe can be run.

Select Virtual Apps and Desktops. Virtuals Apps would just publish single programs as apps.

Start by installing Delivery Controller and other components.

Just in case you are wondering: Some obvious steps will not be shown.

We are installing all the features on the same server. Like I said, Delivery Controller and Director should be on one server, License Server on another, and Storefront on another. Storefront and Delivery Controller should have 2 VMs each for High Availability.

I am also using SQL Express on the same server. Normally you would use a dedicated instance on a separate database server.

The server will be restarted. You will need to mount the ISO again and select the target folder:

And after some time…

Our main tool is going to be Citrix Studio.

Make sure you a logged in with a domain user. Local users are not supported.

Configuring a new site.

These parameters will be automatically populated if SQL Express is being used. If using a separate database server a script can be generated to create the databases and tables.

My license server is hosted on the same server.

A connection to VMware or Hyper-V can be made. I am using Azure.

I will select “Other Tools” this time, I’ll make a post about Citrix MCS another time.

Enter your Azure Subscription ID and any name and then select “Create New”.

You will log in to Azure AD. This process creates a new Service Principal in Azure AD that allows Citrix to start, stop, create, and delete VMs in Azure.

In your Subscription under Access control (IAM) you will see a new App Principal as a Contributor.

App-V and AppDNA is not our focus right now.

Here is the summary of my settings.

To deliver a desktop we need at least one server to connect to.

Create a new VM, join it to the domain, and install the Virtual Delivery Agent (VDA).

Run autoselect.exe inside the ISO again.

We are not creating a Master Image for MCS. The Delivery Group will have a catalog of one machine.

Citrix Workspace App is not needed. You can de-select it.

I did not select any additional components.

Add the Delivery Controller.

Enable both features

Leave Firewall Rules to automatic.

Prerequisites will be installed.

Server will restart twice.

Create a Machine Catalog containing the Remote Desktop Session Host.

This is a server with multiple users connecting to it.

Select the VM and the computer account.

Give it a name.

Create a Delivery Group.

Select the Machine Catalog we just created

You should probably create a custom group to limit the users.

Add a new desktop and give it a name. I use “TreatAsApp” to show both Desktops and Apps in one tab.

Under Search, we can see if the server has successfully registered with the Delivery Controller.

Now the Desktop can be started through http://ctx01.company.lab/Citrix/StoreWeb/

Configure Storefront to use SSL

Open Internet Information Services (IIS)

Create a self-signed certificate (I do not have Active Directory Certificate Services on my lab environment). I might do a post about that in the future.

Run through the wizard (easy).

Make sure you select the personal certificate store.

Add a new Binding on port 443.

Select the certificate you just signed.

Now both 80 and 443 are active:

Change the Base URL to HTTPS

Now HTTPS is being shown:

Configure Passthrough authentication

The storefront URL should be added to the Trusted Sites for pass-through authentication to function properly. Make sure to change "User Authentication" to "Automatic logon with current username and password". The default setting is "Automatic logon only in Intranet Zone"

Also, configure pass-through authentication for Receiver for Web Sites.

Change loopback communication to OnUsingHttp:
Change “Enable loopback communication” to OnUsingHttp

Set this Site as default in IIS:

Configure Delivery Controller to use SSL

Storefront does not accept self-signed certificates, so an internal Certificate Authority is needed for SSL communication between Storefront and Delivery Controller.

That's it! It was a long but very interesting post.

Reading time: 4 min

Remote Desktop Services (RDS) on Windows Server 2019

March 1, 2020 by AJNI No Comments

I got tasked with installing a brand new Windows Server 2019 with the Remote Desktop Services (RDS) role. It was a pretty straightforward installation, but minor things might work differently compared to previous versions of Windows Server (I was migrating off Windows Server 2012 R2).

Start by adding the RDS role through Server Manager.

Select the RDS installation:

I went for the Quick Start because my deployment is fairly basic.

Session-based deployment enables multi-session support on the server.

The server should be automatically selected.

The three roles (RD Connection Broker, RD Web Access and RD Session Host) will be installed.

After the installation a license warning will be shown in the Notification Center.

Two things are needed in order for licensing to work properly: The license server and licensing mode.
In a production environment, usually there is a separate server hosting the RDS Licensing service.

Server Manager > Remote Desktop Services > Overview > Tasks > Edit Deployment properties

I had problems with the licensing mode not being applied properly. This registry key worked wonderfully though:

HKEY_LOCAL_MACHINE\SYSTEM\CurrentControlSet\Control\Terminal Server\RCM\Licensing Core
DWORD LicensingMode
4 = Per user
2 = Per Device

The license server can be also set through the registry:

HKEY_LOCAL_MACHINE\SYSTEM\CurrentControlSet\Services\TermService\Parameters\LicenseServers
REG_MULTI_SZ SpecifiedLicenseServers = license.ajni.lab

With RD Licensing Diagnoser you can check for potential errors (can be opened through Server Manager > Tools > Remote Desktop Services).

Now on to the last step: Create a custom device collection.

Server Manager > Remote Desktop Services > Collections > Tasks > Create Session Collection

This is also pretty straight forward stuff.


Make sure you select the server by moving it to the right with the arrow.

In a production environment a custom group should be used to control the number of permitted users.

User profile disks were not needed in my environment.


After the creation, there are some things that should be changed in the Collection properties (Server Manager > Remote Desktop Services > Collections > Collection Name):

These are my specific settings, you should change the parameters based on your experience or leave them at their default values.

Older clients might have problems with these security settings (like Network Level Authentication - NLA)

Do not forget to apply the changes.

Bonus:

If you have specific AD user attributes, like the home folder or program auto-start, they will not work because of changes made to RDS 2016/2019. You can read this article from Microsoft's website: https://support.microsoft.com/en-us/help/3200967/changes-to-remote-connection-manager-in-windows-server

Following registry entries will tell the Remote Desktop Session Host (RDSH) to query AD DS for RDP profile settings:

HKEY_LOCAL_MACHINE\SOFTWARE\Policies\Microsoft\Windows NT\Terminal Services
Name: fQueryUserConfigFromDC
Type: Reg_DWORD
Value: 1

HKEY_LOCAL_MACHINE\SYSTEM\CurrentControlSet\Control\Terminal Server\WinStations\RDP-tcp
Name: fQueryUserConfigFromDC
Type: Reg_DWORD

Reading time: 2 min

Windows Server 2019: Installing the first Domain Controller in a new domain

October 22, 2019 by AJNI No Comments

So last time we created a Master-VHDX on Hyper-V with Windows Server 2019 in order to save space. Today we are installing the first Domain Controller with a fresh domain. Very straight forward stuff.

Before installing Active Directory Directory Services, the computer should have a decent name.

Give it a fixed IP address. Since this is going to be a lab, I am not going to plan the IP design. The Default Gateway does not exist yet. Also, the secondary DNS server will be installed later on a Server Core version.

From Server Manager Add Roles and Features, Select Role-based or feature-based installation

Select the Active Directory Directory Services Role

Everything else can be left on default.

Once the installation is completed, the server can be promoted to a Domain Controller.

Since there is no existing forest, the root domain name must be defined:

Define a new password for the Directory Services Restore Mode (DSRM). DSRM allows you to perform an authoritative restore of single or multiple AD objects through ntdsutil (from cmd).

This warning can be safely ignored.

The NetBIOS domain name can be used when logging into a domain computer, for example AJNI\Domainuser. The UserPrincipalName can be also used – domainuser@ajni.it.

The rest can be left to default.

The server will restart, after that the domain will be up and running!

The next blog post will be covering the installation of an additional Domain Controller (the second DNS server 10.10.10.11) with Windows Server 2019 Core Edition.

Stay tuned !

Reading time: 1 min

Hyper-V: Create a master VHDX with Differencing Disks

October 4, 2019 by AJNI No Comments

Hyper-V has a very interesting feature that allows to save a lot of space: By creating a golden VHDX Disk with the base operating system, you can then use so called “Differencing” disks, which reference the Master VHDX and only save the changes on their disk.

So, first things first: Just create a normal VM to prepare the golden image for later use.

Hyper-V Specify Name and Location

Specify Generation 2

Hyper-V specify VM generation

Give the Golden disk a self-explanatory name

Hyper-V Connect Virtual Hard Disk

Before starting the VM, disable automatic checkpoints (in VMware known as Snapshots) and give it more juice. Do not forget to apply changes:

Hyper-V VM Settings-Checkpoints
Hyper-V VM Setting Processor

Install the OS (standard procedure)

Once the OS installed and custom settings are made, the machine is ready to be Sysprep’ed.

Windows+R sysprep
Sysprep

Delete the VM once stopped, the disk will not be deleted. Then locate the VHDX and set it into Read-Only mode.

Hyper-V delete Virtual Machine
File Properties

Now a new VM can be created in Hyper-V with a Differencing disk. Note: In the VM creation wizard specify “Attach a virtual disk later”:

Attach a virtual Disk later

Now in the VM settings under SCSI Controller add a new Hard Drive:

Hyper-V VM Settings New Hard Drive

Select the last option for Differencing:

Differencing Disk

This will be the new disk name:

Hyper-V New Disk Name

And finally, the base disk we created previously:

Specify Parent Disk

Before powering on the machine make sure the new disk is first in the boot order.

Hyper-V VM Settings Boot Options

The VM is up and running!

Windows Server 2019 Settings

Notice the size of the new VHDX. Only 1.4 GB!

Windows Explorer File Size

In the VM settings you can once again inspect the disk and see the relationship with the golden disk.

Hyper-V Inspect Hard Drive
Hyper-V Virtual Hard Disk Properties
Reading time: 1 min

Tip Of the Day

  • Delete or rename a folder with a blank space at the end

    4 weeks ago

Recent Posts

  • Microsoft AlwaysOn VPN Deployment
  • Delete or rename a folder with a blank space at the end
  • Automatic program start at logon with GPOs
  • Reset Computer Secure Channel of a Domain Computer with one PowerShell command
  • Let Outlook connect to Exchange Online instead of Exchange On-Prem

Categories

  • Azure (5)
  • Citrix XenApp (6)
  • Citrix Xendesktop (4)
  • Cloud Computing (18)
  • Coding (1)
  • Hyper-V (5)
  • Linux (8)
  • Powershell (8)
  • Security (2)
  • VDI (4)
  • Virtualization (12)
  • VMware (5)
  • Windows (16)
  • Windows Client OS (14)
  • Windows Server (23)

Archives

  • December 2020
  • November 2020
  • September 2020
  • August 2020
  • July 2020
  • June 2020
  • May 2020
  • April 2020
  • March 2020
  • February 2020
  • November 2019
  • October 2019
  • September 2019
  • August 2019
  • July 2019
  • June 2019
  • May 2019
  • April 2019
  • March 2019

ajni IT © 2019