If you are using Citrix MCS with Azure VMs, you might have noticed that not all the VM SKUs are available to select when creating a new Machine Catalog. With PowerShell, though, you can use any Azure VM SKUs.
If you are using Citrix Cloud, you have to download and install the Citrix Powershell SDK and login with your Citrix credentials. Optionally you could download an API client and authenticate with those credentials.
The secure client can be downloaded under Identity and Access Management > API Access > Create client. The customer id will also be shown on that page.
What do we need for a Citrix Virtual Apps and Desktops (XenApp and XenDesktop) deployment?
Active Directory
Citrix Delivery Controller
Citrix Storefront
One Citrix Virtual Delivery Agent (VDA)
Citrix License Server
A Database Server (SQL Server)
I will be consolidating Citrix Delivery Controller, Storefront, and License Server into one VM since this is a lab environment. In a production environment, you would use 2 VMs for Citrix Delivery Controller (for High Availability – HA), two for Citrix Storefront, and one for the License Server. The VDA count depends on user size.
Using the same two VMs for Delivery Controller and Storefront is also viable.
In my lab, all the servers are housing Windows Server 2019 Datacenter.
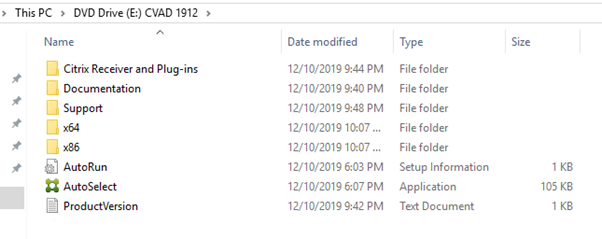
First, download the ISO on citrix.com. You will need an account and if you don’t have any partnership with Citrix, it is very difficult to get those files. There is a form you can fill and all you can do afterward is hope that they give you the files. Otherwise, there is no way of getting them publicly.
After mounting the ISO Autoselect.exe can be run.
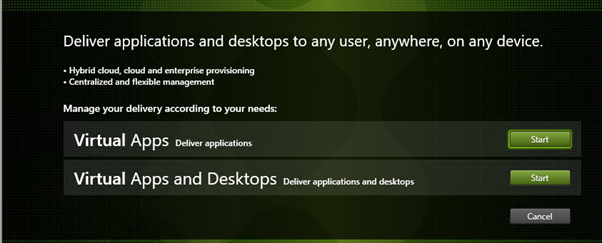
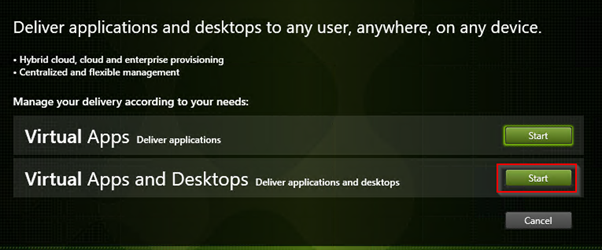
Select Virtual Apps and Desktops. Virtuals Apps would just publish single programs as apps.
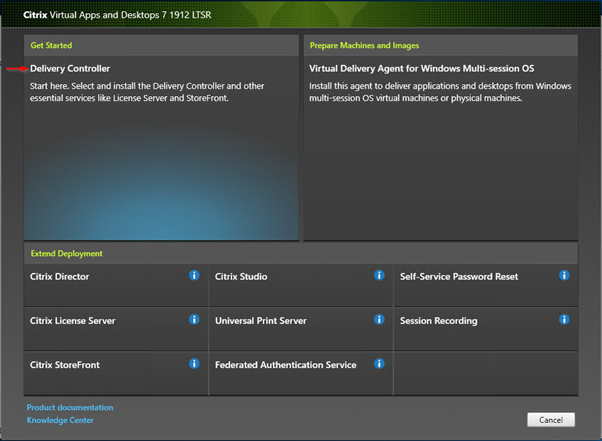
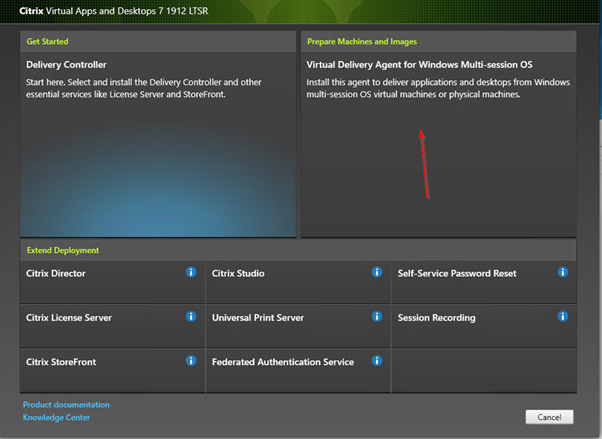
Start by installing Delivery Controller and other components.
Just in case you are wondering: Some obvious steps will not be shown.
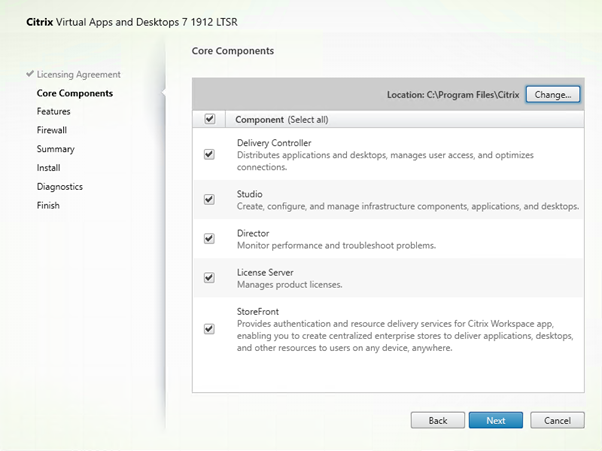
We are installing all the features on the same server. Like I said, Delivery Controller and Director should be on one server, License Server on another, and Storefront on another. Storefront and Delivery Controller should have 2 VMs each for High Availability.
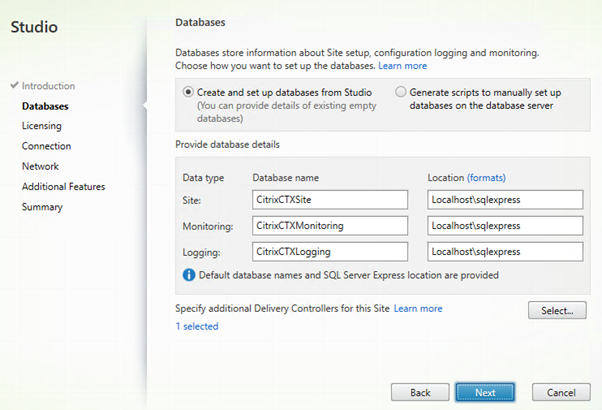
I am also using SQL Express on the same server. Normally you would use a dedicated instance on a separate database server.
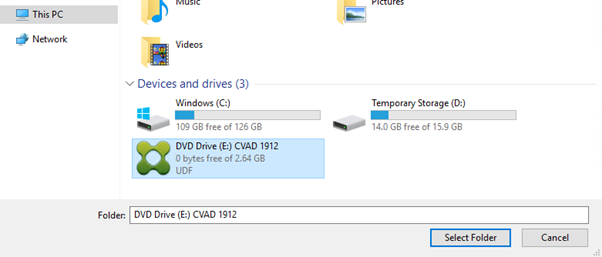
The server will be restarted. You will need to mount the ISO again and select the target folder:
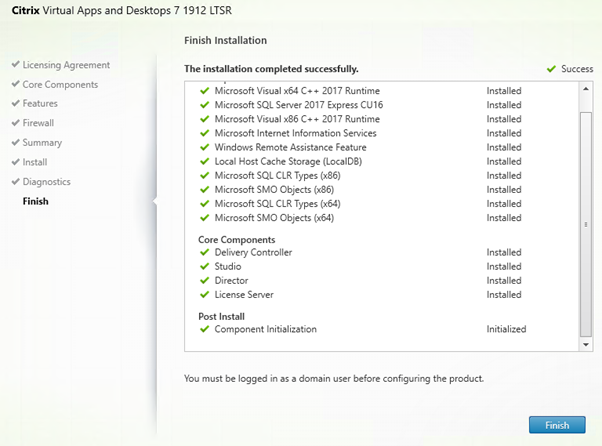
And after some time…
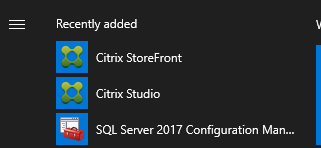
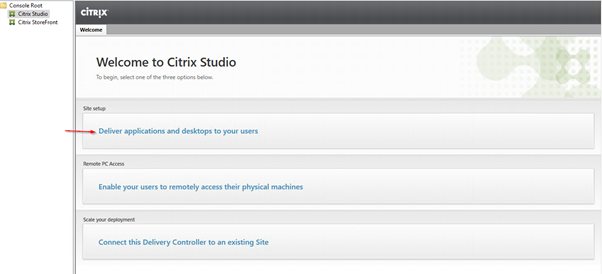
Our main tool is going to be Citrix Studio.
Make sure you a logged in with a domain user. Local users are not supported.
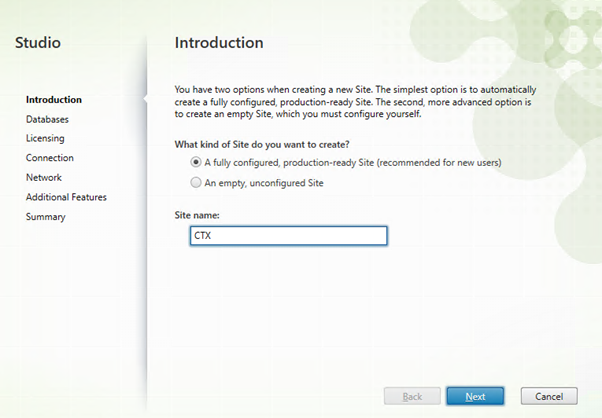
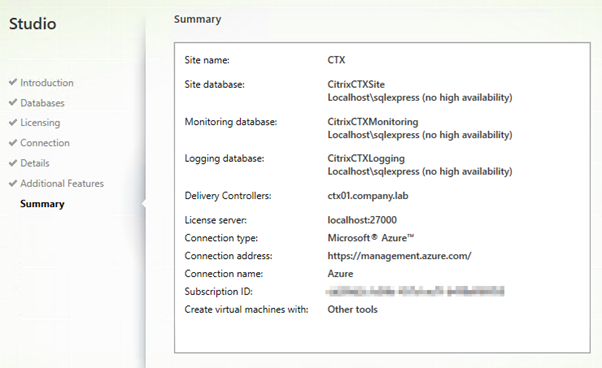
Configuring a new site.
These parameters will be automatically populated if SQL Express is being used. If using a separate database server a script can be generated to create the databases and tables.
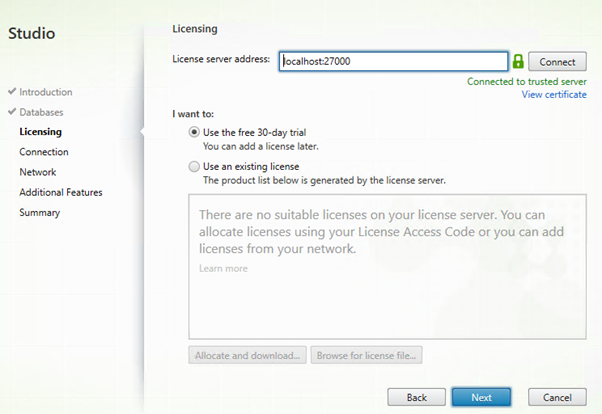
My license server is hosted on the same server.
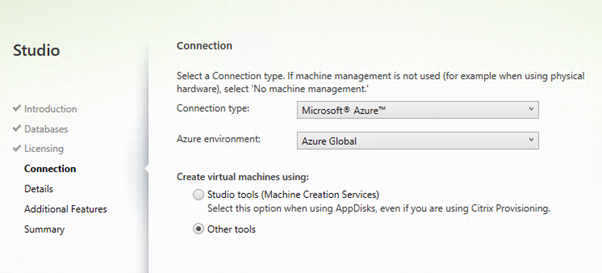
A connection to VMware or Hyper-V can be made. I am using Azure.
I will select “Other Tools” this time, I’ll make a post about Citrix MCS another time.
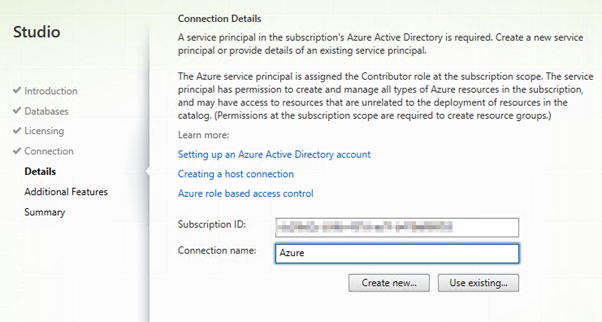
Enter your Azure Subscription ID and any name and then select “Create New”.
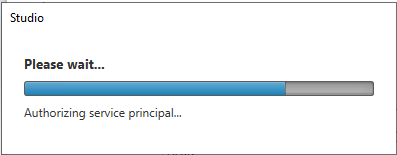
You will log in to Azure AD. This process creates a new Service Principal in Azure AD that allows Citrix to start, stop, create, and delete VMs in Azure.
In your Subscription under Access control (IAM) you will see a new App Principal as a Contributor.
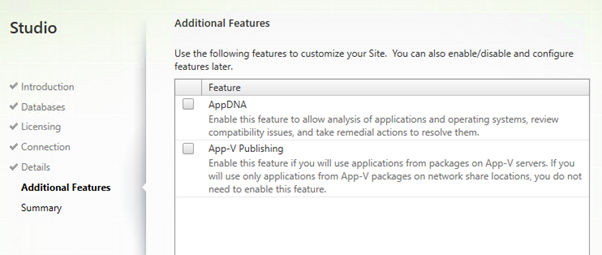
App-V and AppDNA is not our focus right now.
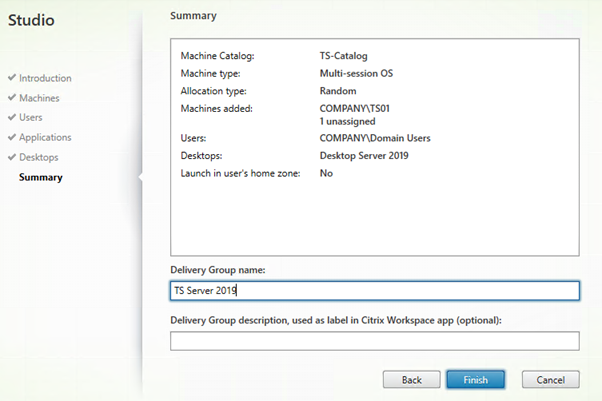
Here is the summary of my settings.
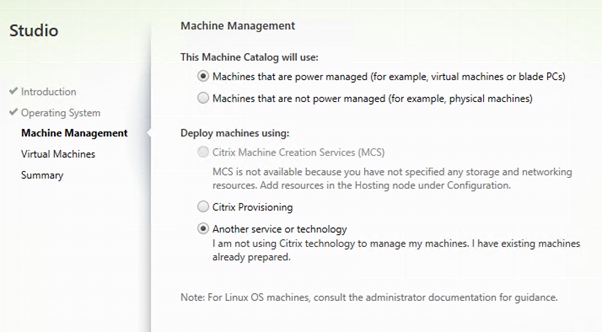
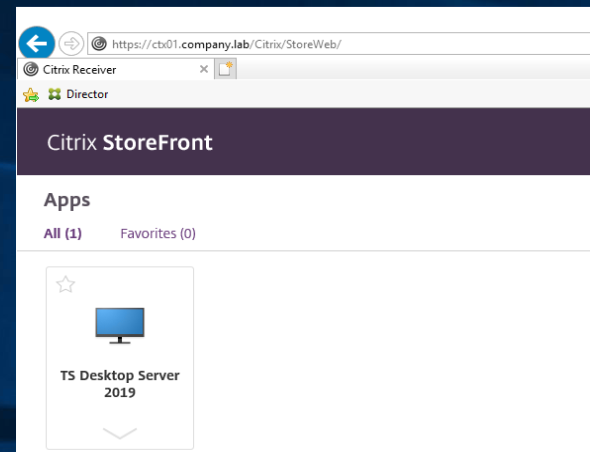
To deliver a desktop we need at least one server to connect to.
Create a new VM, join it to the domain, and install the Virtual Delivery Agent (VDA).
Run autoselect.exe inside the ISO again.
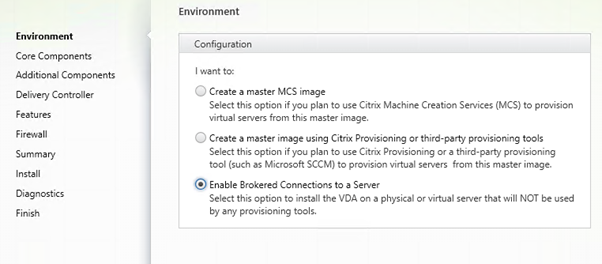
We are not creating a Master Image for MCS. The Delivery Group will have a catalog of one machine.
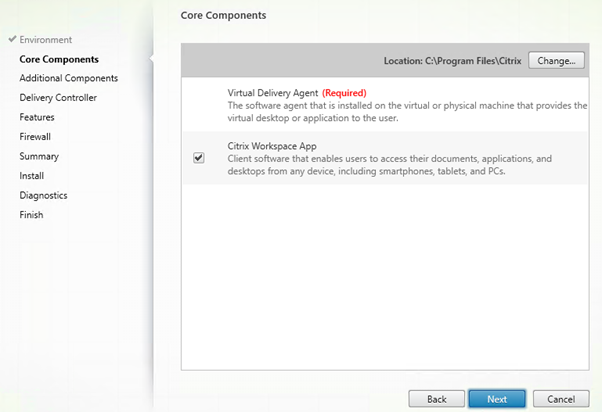
Citrix Workspace App is not needed. You can de-select it.
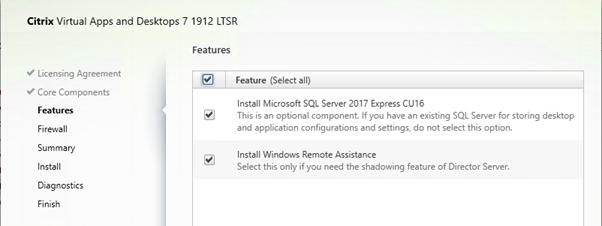
I did not select any additional components.
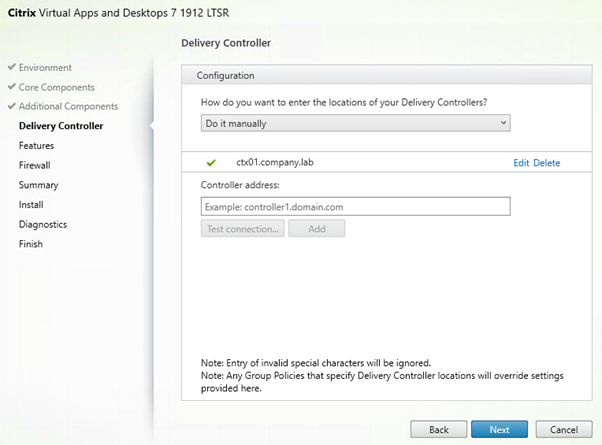
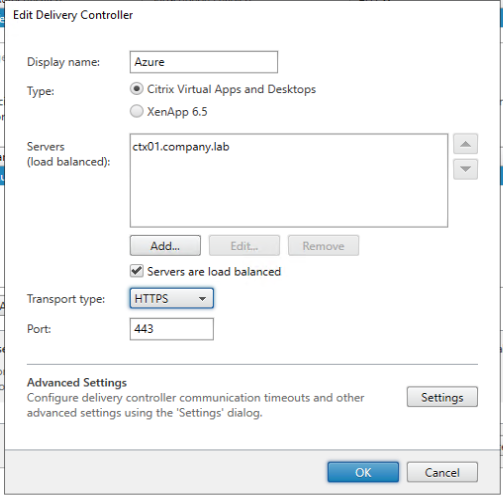
Add the Delivery Controller.
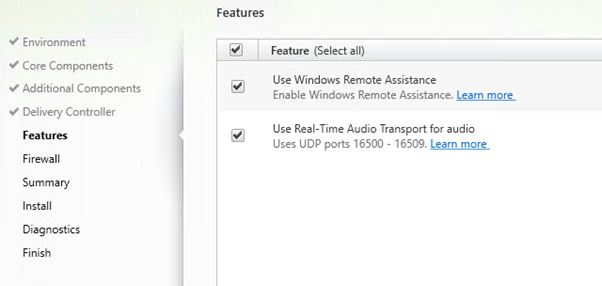
Enable both features
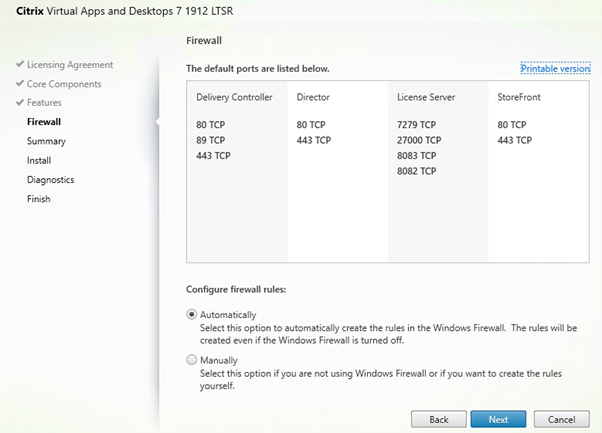
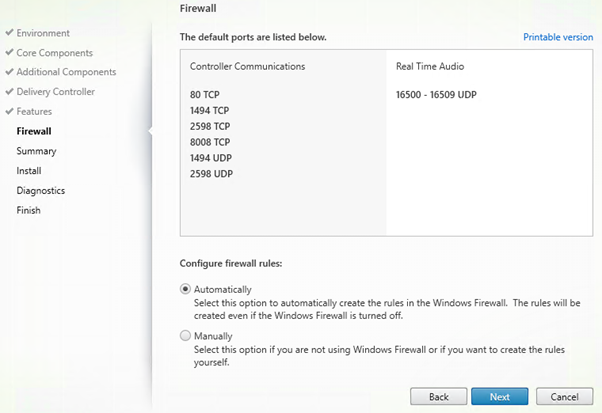
Leave Firewall Rules to automatic.
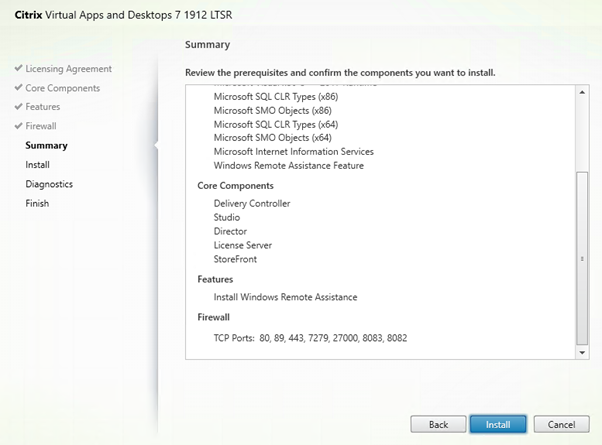
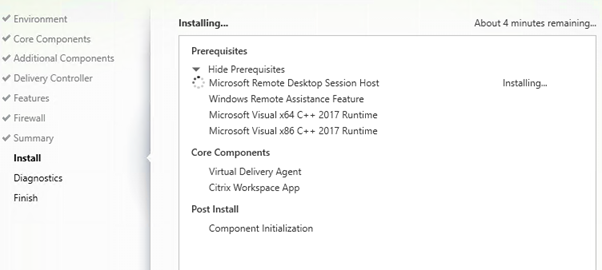
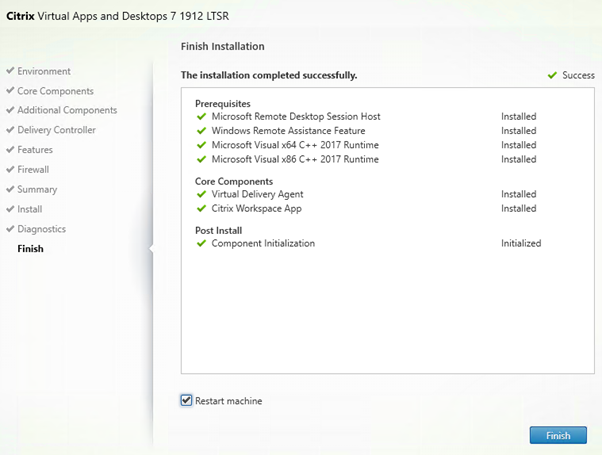
Prerequisites will be installed.
Server will restart twice.
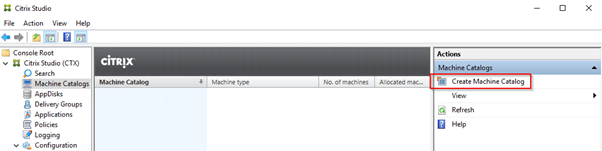
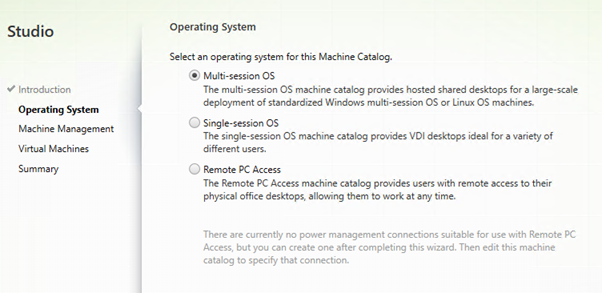
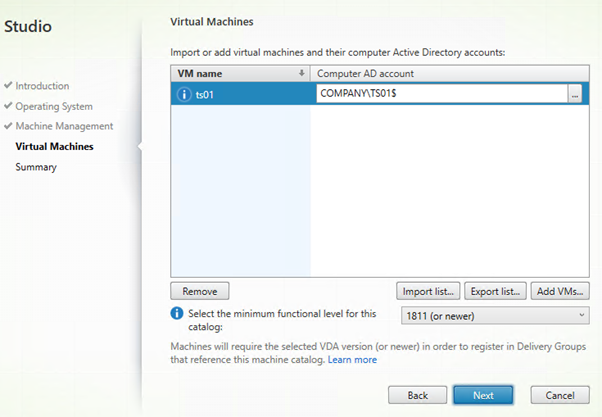
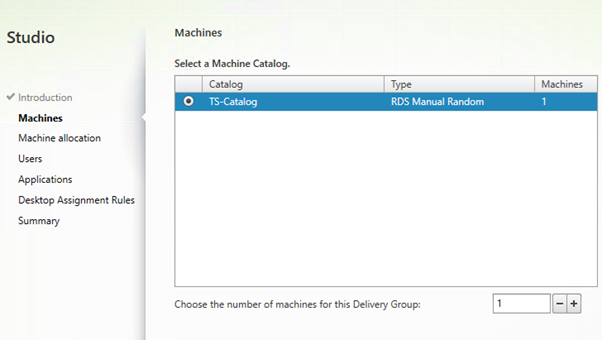
Create a Machine Catalog containing the Remote Desktop Session Host.
This is a server with multiple users connecting to it.
Select the VM and the computer account.
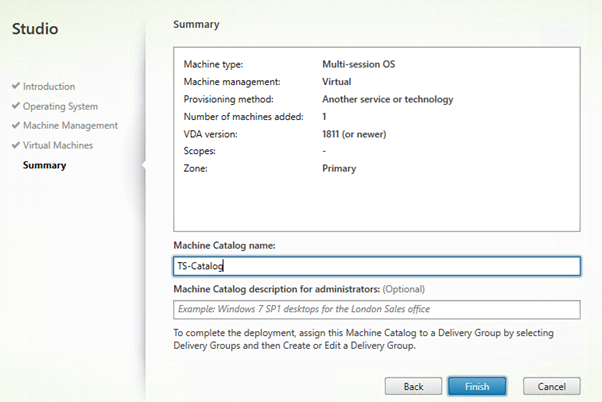
Give it a name.
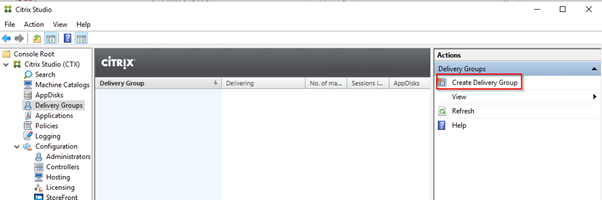
Create a Delivery Group.
Select the Machine Catalog we just created
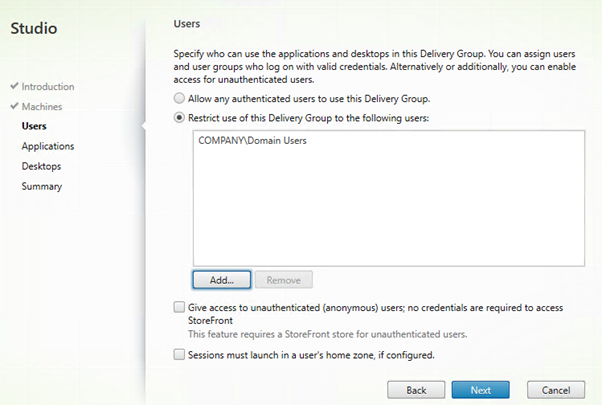
You should probably create a custom group to limit the users.
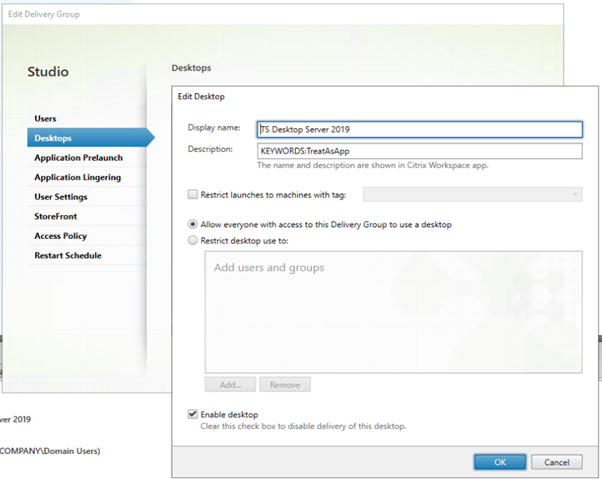
Add a new desktop and give it a name. I use “TreatAsApp” to show both Desktops and Apps in one tab.
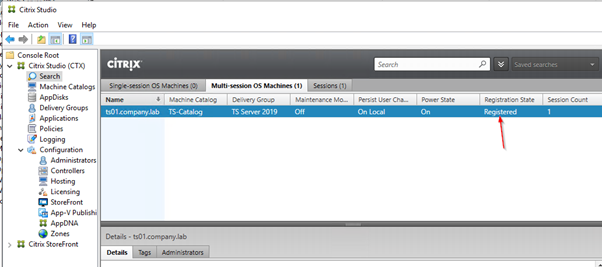
Under Search, we can see if the server has successfully registered with the Delivery Controller.
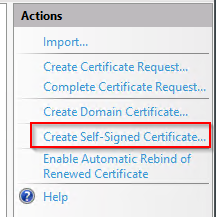
Create a self-signed certificate (I do not have Active Directory Certificate Services on my lab environment). I might do a post about that in the future.
Run through the wizard (easy).
Make sure you select the personal certificate store.
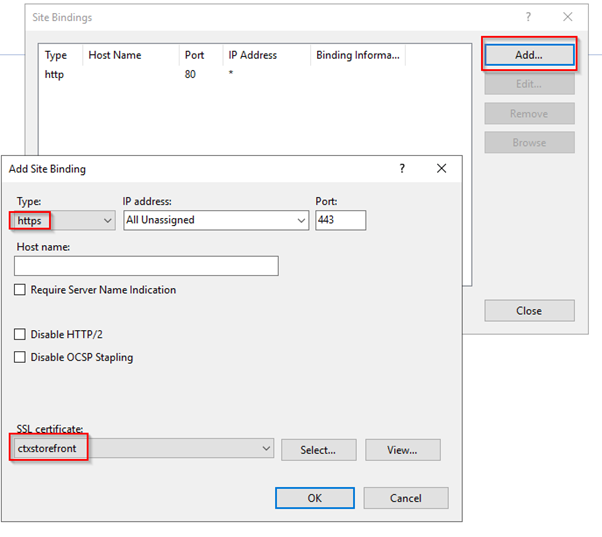
Add a new Binding on port 443.
Select the certificate you just signed.
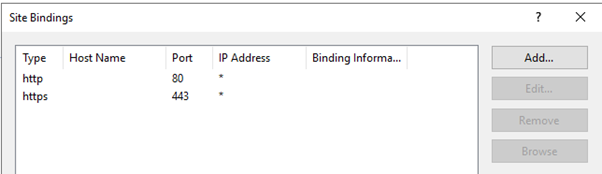
Now both 80 and 443 are active:
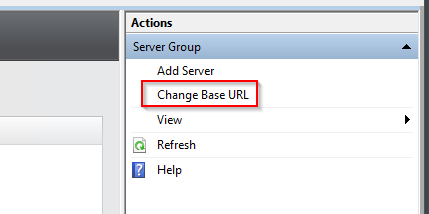
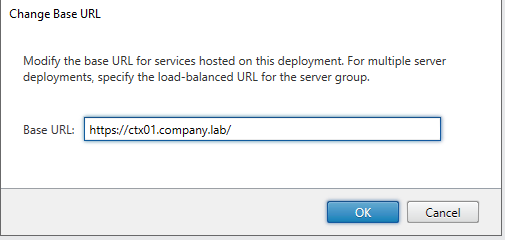
Change the Base URL to HTTPS
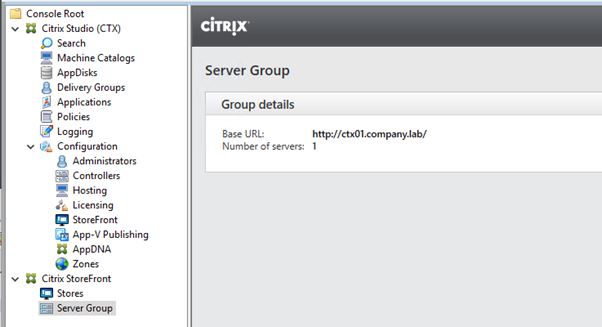
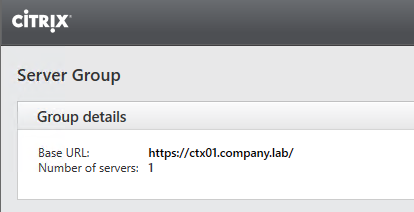
Now HTTPS is being shown:
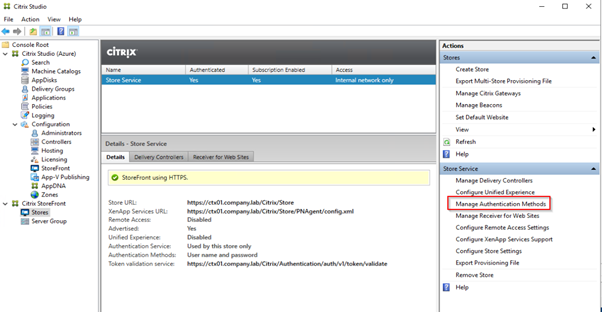
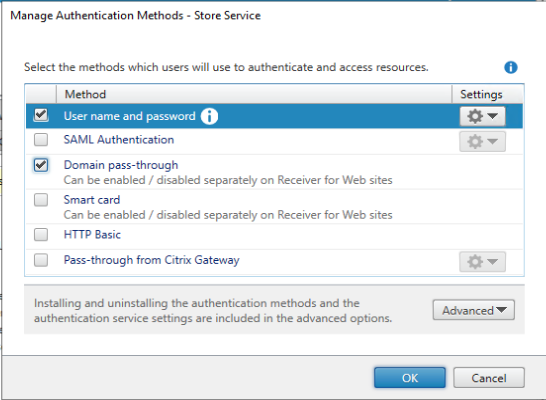
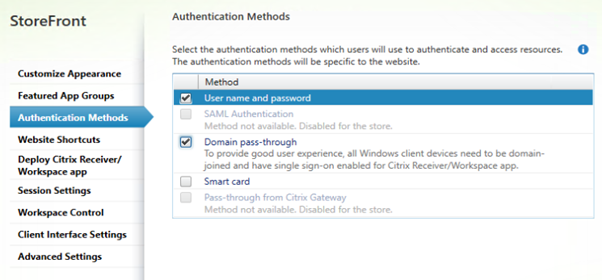
Configure Passthrough authentication
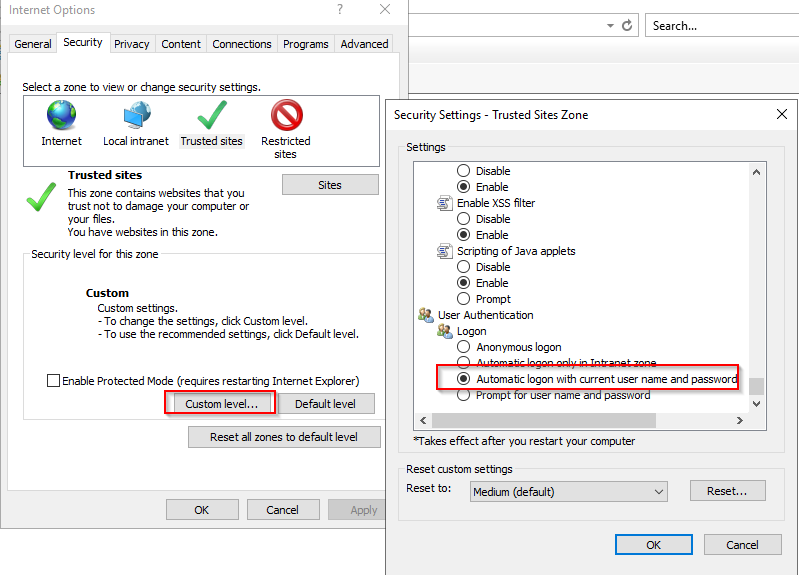
The storefront URL should be added to the Trusted Sites for pass-through authentication to function properly. Make sure to change “User Authentication” to “Automatic logon with current username and password”. The default setting is “Automatic logon only in Intranet Zone”
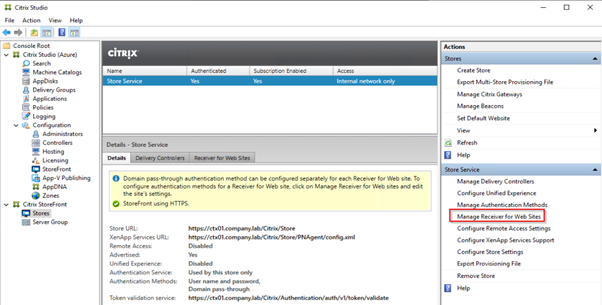
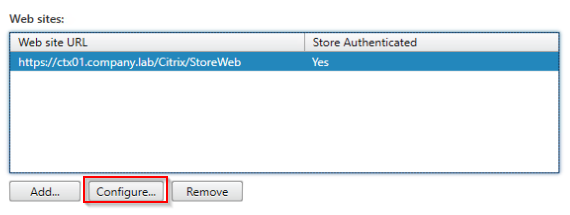
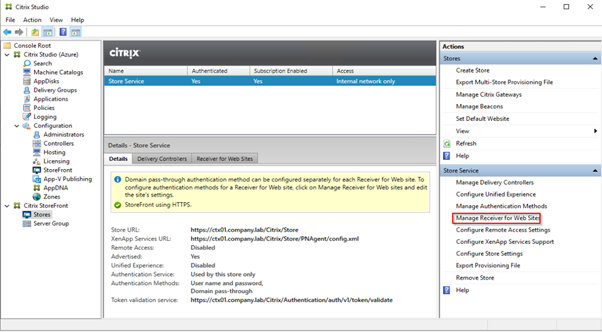
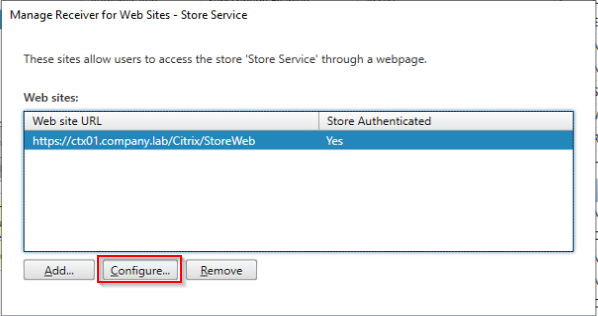
Also, configure pass-through authentication for Receiver for Web Sites.
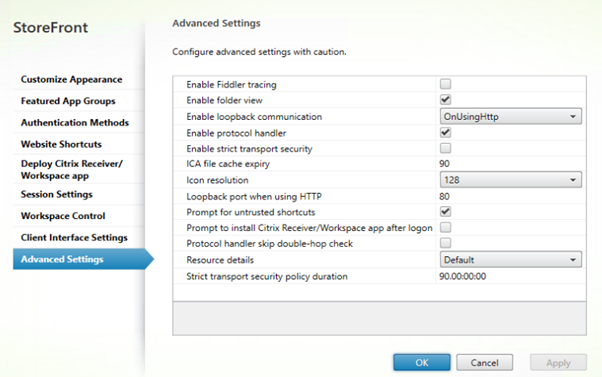
Change loopback communication to OnUsingHttp:
Change “Enable loopback communication” to OnUsingHttp
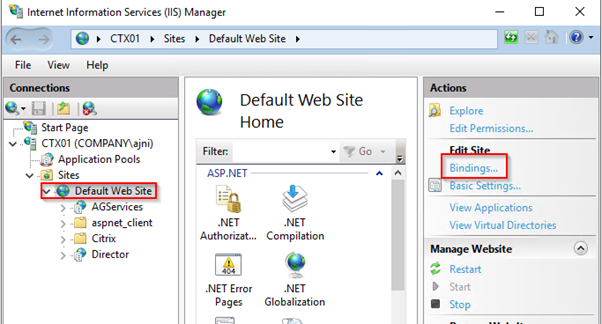
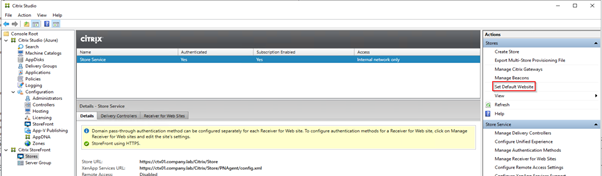
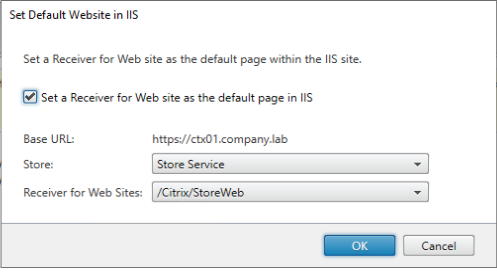
Set this Site as default in IIS:
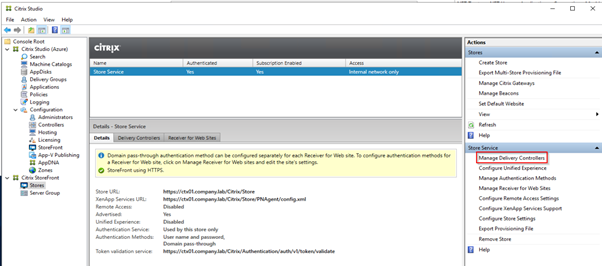
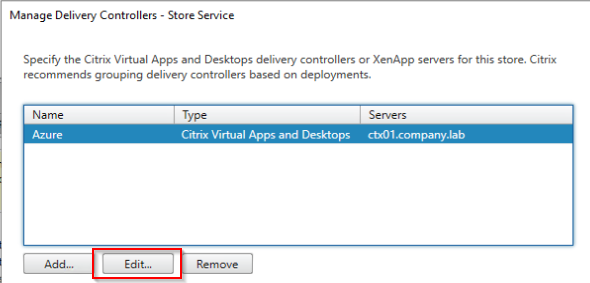
Configure Delivery Controller to use SSL
Storefront does not accept self-signed certificates, so an internal Certificate Authority is needed for SSL communication between Storefront and Delivery Controller.
That’s it! It was a long but very interesting post.
A quick post on how to change the Windows display language with Powershell. You might use these commands based on any logic that determines the user’s location/language. For instance, I created a script that gets executed on logon and sets the language based on some criteria (maybe an Active-Directory group or attribute).
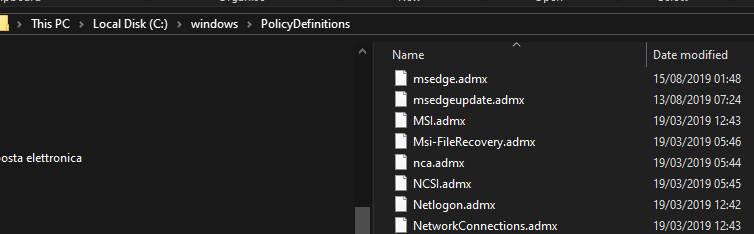
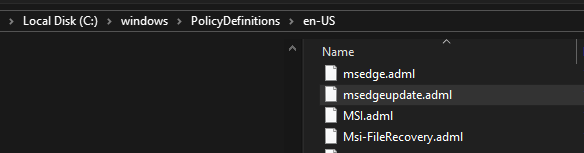
How to import them in the GP Editor? Easy. You can test them on your local machine first. Just copy the files msedge.admx and msedgeupdate.admx to C:\windows\PolicyDefinitions and the language .adml files to C:\windows\PolicyDefinitions\en-US.
In an Enterprise environment you normally move these files into the central group policy store, located under \\domain.com\SYSVOL\domain.com\policies\PolicyDefinitions.
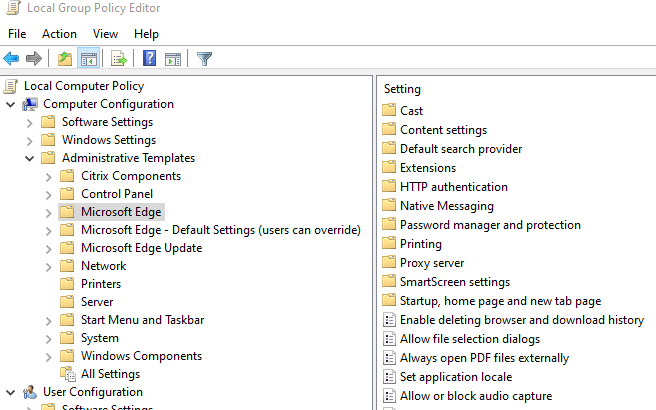
After opening Group Policy Editor (gpedit.msc), under Computer Configuration > Administrative Templates you will see the newly imported Policies:
Now let’s specifically configure the IE Mode feature. For that we need to configure two settings. The first will configure the IE Mode and the second one lists the websites that are affected by IE Mode.
Under Microsoft Edge > Configure Internet Explorer Integration you want to select Internet Explorer Mode in order to integrate IE with the new Edge in case one of the specificied URLs is visited:
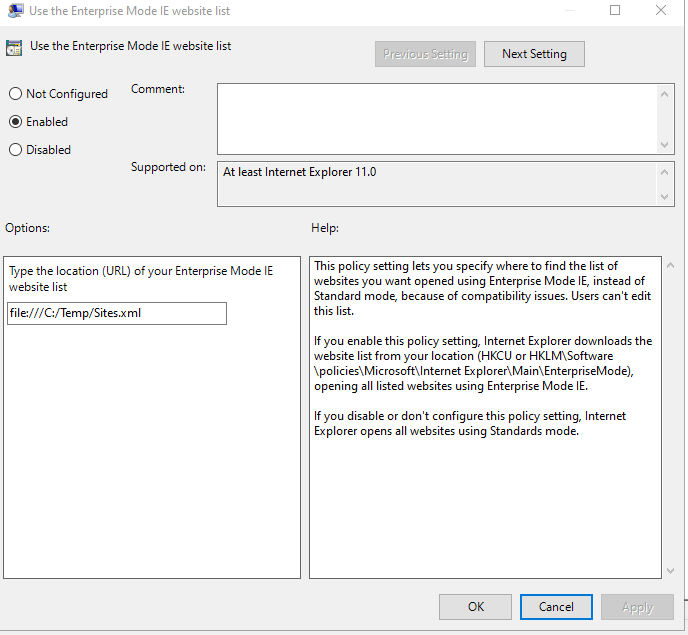
The second one is located under Windows Components > Internet Explorer > Use the Enterprise Mode IE Website List. You can use a file:///C:/local/path.xml, a \\network\path or a https://URL that hosts the XML file. I will be using a local path here.
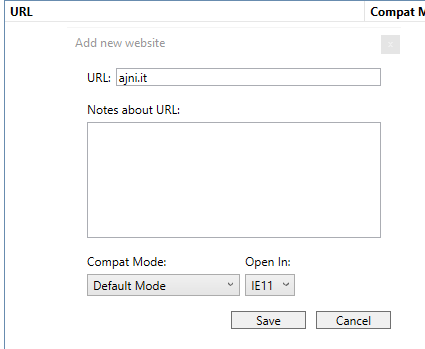
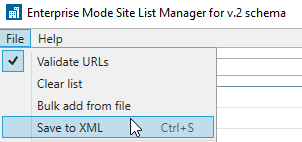
With the MS Tool Enterprise Mode Site List Manager you can easily add or edit the site list. Just add a new URL, select the IE Mode you want to use and save it as an XML.
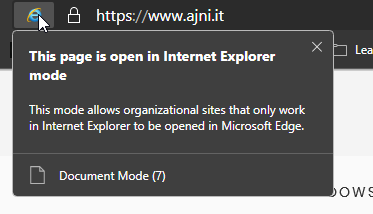
Now do a gpupdate /force, restart Edge and test your site. You will know that the policy has applied if you see the IE icon when you visit a site you have specified in the Enterprise Mode Site List Manager.
If you are having issues getting this to work, make sure your device has the latest Windows Updates installed, like stated in the Microsoft documentation.
Also this feature is not yet supported on Windows Server 2016 and some older versions of Windows 10.
If you have problems with MS Edge on Windows Server 2016 RDS with Citrix XenApp, you will have to exclude the process msedge.exe from Citrix hooks:
HKEY_LOCAL_MACHINE\SOFTWARE\Citrix\CtxHook
REG_SZ “ExcludedImageNames”
Value “msedge.exe”