Home
Microsoft 365
Linux
Windows
Powershell
Cloud Computing
    Citrix Xendesktop
    Citrix XenApp
Useful links
About
  • Home
  • Microsoft 365
  • Linux
  • Windows
  • Powershell
  • Cloud Computing
    • Citrix Xendesktop
    • Citrix XenApp
  • Useful links
  • About
ajni.IT -
Citrix XenApp•VDI•VMware

Citrix Provisioning Services – Update VMware Tools on Masterimage / vDisk

August 24, 2023 by AJNI 2 Comments

Updating VMware Tools on a Citrix Provisioning Master Image used to be very time consuming. Nowadays it has gotten a little better, but you still have to do a few extra steps because of the vmxnet3 network adapter. Here are the steps that I took when upgrading to the newest Vmware Tools that came with ESXi 8.0 update.

  • Start the Master VM
  • Once booted up, add a new E1000E network card
  • Check in device manager if the E1000E/Intel network card can be seen
  • Shutdown VM
  • In the Provisioning console, change the mac address of the target device to that of the E1000E network card
  • Disconnect vmxnet3 NIC (uncheck connect on power on)
  • Start Master VM. Beware that the E1000E NIC is emulated and is painfully slow. I had instances where it took 15 minutes to boot up!
  • Once booted up, start VMware Tools upgrade through Vcenter (interactive)
  • Visual C++ Redistributable might be installed, you might need to reboot
  • Let boot
  • Start Vmware Tools upgrade again (interactive)
  • Run the installer
  • Shutdown VM
  • Disconnect E1000E NIC (uncheck connect on power on)
  • Connect vmxnet3 NIC (check connect on power on)
  • Boot
  • Once booted, fully remove E1000E fully
  • In device manager, show hidden devices and delete the greyed out Intel NIC

This time there are no references. I had to try and error myself.

Reading time: 1 min
Microsoft 365

Exchange Online Messages sent from a shared mailbox are saved in the main mailbox instead of the shared mailbox

July 26, 2023 by AJNI No Comments

When an Exchange Online user has access to a shared mailbox through full access permissions, he can reply on behalf of that address. The problem is that, by default, emails sent as the shared mailbox are saved in the user’s main mailbox instead of the delegated mailbox. To fix that you have 2 options:

Option 1: Use Exchange Online Powershell

For emails sent as the shared mailbox (Full Access)

Set-Mailbox <shared mailbox> -MessageCopyForSentAsEnabled $true

For emails sent on behalf of the mailbox (Send On Behalf)

Set-Mailbox <shared mailbox> -MessageCopyForSendOnBehalfEnabled $true

Option 2: Registry

HKEY_CURRENT_USER\Software\Microsoft\Office\x.0\Outlook\Preferences

DWORD DelegateSentItemsStyle 1

Note! Outlook must be configured to run in cached mode, otherwise mails will get stuck in the Outbox.

References:

https://learn.microsoft.com/en-us/exchange/troubleshoot/user-and-shared-mailboxes/sent-mail-is-not-saved

Reading time: 1 min
Citrix XenApp•Citrix Xendesktop•Cloud Computing

Citrix NetScaler allow password change when password expires

June 20, 2023 by AJNI No Comments

In this article we are going to configure password change through Citrix Netscaler, which is very handy nowadays that a lot of people work from home and are rarely in the office. The steps are very simple but you should always think what the impact of the change could be before blindy following my screenshots.

First of all, you need a certificate on the Domain Controller(s). Since Microsoft does not allow plaintext password change through port 389, you need a certificate for the SSL Port 636. This can be achieved with an internal Certificate Authority. Check my article here: https://www.ajni.it/2020/08/active-directory-certificate-services-ad-cs-on-windows-server-2019/

There is a quick way with a self signed certificate, but I would recommend using a Certificate Authority.

New-SelfSignedCertificate -DnsName dc01, dc01.ajni.it, dc02, dc02.ajni.it -CertStoreLocation cert:\LocalMachine\My

You can also insert multiple Subject Alternative Names separated by comma, that might include two or more Domain Controllers like in the example above.

Testing can be done with lpd.exe, make sure that the newly generated certificate is also placed in the Trusted Root Certificate Authorities.

In Citrix Netscaler go to Citrix Gateway > Virtual Servers > Select the VIP > Primary Authentication > Select the LDAP Policy:

Edit Server

Select SSL under Security Type and Port 636

Further down, select Allow Password Change.

In Citrix Storefront, make sure Password Change is enabled:

The password reminder can also be enabled.

That’s it. Make sure your NetScaler Config is saved!

References:

https://c4rm0.wordpress.com/netscaler-allow-user-ad-password-changes/

https://anandthearchitect.com/2019/10/10/active-directory-self-signed-certificate-for-ldaps/

Reading time: 1 min
Microsoft 365

DomainKeys Identified Mail and Microsoft 365 Exchange Online and how to configure it

April 27, 2023 by AJNI No Comments

Mailing is daily business in an organization and to increase the trustworthiness of your domain, you should firstly configure a TXT/SPF record and secondly configure DomainKeys, also known as DKIM.

DKIM works by adding a digital signature to the header of an email message that verifies that the message was sent from a trusted source and has not been tampered with during transmission.
When an email is sent using DKIM, the sender’s domain name is included in the digital signature. This allows the receiving email server to verify that the message was sent from an authorized sender and that the message has not been modified in transit. If the digital signature is valid, the email is considered to be legitimate and is delivered to the recipient’s inbox. If the digital signature is invalid, the email is likely to be marked as spam or blocked entirely.

Configuring DKIM if you have Microsoft 365 Exchange Online as a mail system is very straightforward. Just go to https://security.microsoft.com/dkimv2 and enable DKIM on the corresponding domain. Afterwards create the DNS entries as instructed by Microsoft 365.

Usually you’ll have 2 entries, for example:

selector1 and selector2._domainkey.ajni.it CNAME pointing to a Microsoft internal DNS entry.

After creating the DNS entries (like usual you’ll have to wait a bit because of DNS and its slowness), you can verify them in the M365 portal and activate the DKIM signature on all emails (see reference below).

If you have a newsletter solution that does not use Microsoft 365 to send emails, you should check whether they offer DKIM (they should otherwise it’s not a proper newsletter software). Usually you’ll have to configure two CNAME DNS entries on your domain with a selector, similar to Microsoft 365:

k1_domainkey.domain.com and k2_domainkey.domain.com CNAME points to the newsletter solution domain. The TXT record of that DNS record contains the public key. See mailchimp for example:

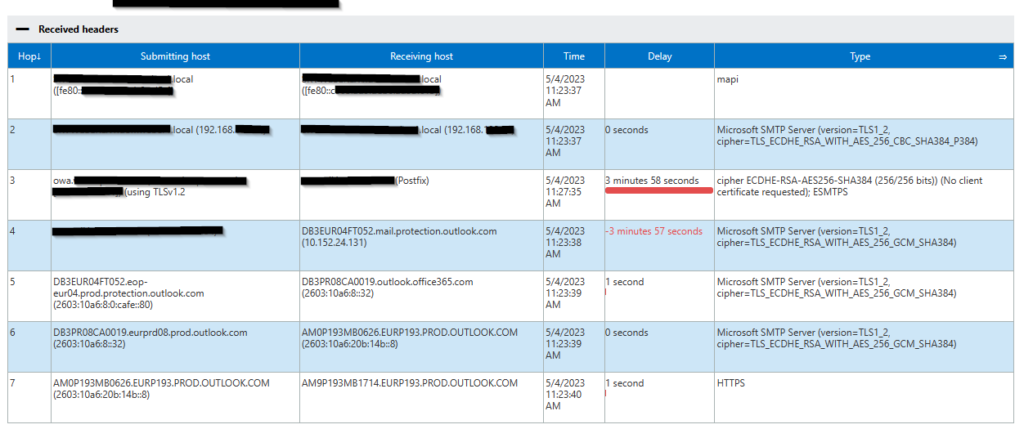
Looking at the message headers, you can see that domain signature is all right:

ARC-Authentication-Results  i=2; mx.google.com; dkim=pass header.i=@ajni.it header.s=selector1 header.b=TJJLfT54; arc=pass (i=1 spf=pass spfdomain=ajni.it dkim=pass dkdomain=ajni.it dmarc=pass fromdomain=ajni.it); spf=pass (google.com: domain of test@ajni.it designates 2a01:111:f400:7e24::614 as permitted sender) smtp.mailfrom=test@ajni.it

The next step would be to configure a DMARC policy, so that someone trying to impersonate your domain gets rejected and reported to you.

When an email is received, the receiving email server checks the sender’s domain for a DMARC policy, and then follows the instructions specified in that policy to determine whether the email is legitimate or not.

A sample DMARC policy would look like this:

_dmarc.ajni.it TXT
v=DMARC1; p=reject; rua=mailto:dmarcreports@example.com; ruf=mailto:dmarcfailures@example.com; sp=none; aspf=r;

This policy tells email receivers to reject any messages that fail authentication checks (p=reject), and to send aggregate and forensic DMARC reports to the specified email addresses (rua and ruf). The policy also indicates that the domain owner is not enforcing a policy for messages that do not pass SPF checks (sp=none), and that they are requesting SPF-aligned messages to be treated as passing but are not requiring DKIM alignment to pass (aspf=r).

This is just an example and policies may vary depending on the organization’s specific needs and email infrastructure.

References:

https://learn.microsoft.com/en-us/microsoft-365/security/office-365-security/email-authentication-dkim-configure?view=o365-worldwide

Reading time: 2 min
Citrix XenApp•Citrix Xendesktop•VDI

Citrix Virtual Apps and Desktops 2203+ (or even older) cannot reconnect disconnected session

April 12, 2023 by AJNI No Comments

Having issues with users reconnecting a disconnected Citrix Virtual Apps and Desktops session? These keys might help you. Citrix support confirmed, that they help starting at Server 2016 VDA.

Fastreconnect is a feature that was introduced by Microsoft to enhance session reconnect through RDP, but through Citrix ICA it seems that is does not improve anything.

HKEY_LOCAL_MACHINE\SOFTWARE\Citrix\Reconnect
FastReconnect REG_DWORD 0

HKEY_LOCAL_MACHINE\SOFTWARE\Citrix\Ica\GroupPolicy
EnforceUserPolicyEvaluationSuccess REG_DWORD 0

References:

https://www.reddit.com/r/Citrix/comments/x6frfq/ltsr_2203_disconnected_sessions_are_lost_upon/

Reading time: 1 min
Page 9 of 23« First...«891011»20...Last »

Like what you are reading? Buy me a coffee.

Tip Of the Day

  • Add Alias to Windows Fileserver (Server 2019, 2022, 2025)

    2 days ago

Keep in touch

Oh hi there!
It’s nice to meet you.

Sign up to receive awesome content in your inbox, every month.

Check your inbox or spam folder to confirm your subscription.

Categories

  • AI & Deep Learning (1)
  • Azure (20)
  • Citrix XenApp (21)
  • Citrix Xendesktop (13)
  • Cloud Computing (40)
  • Coding (1)
  • Hyper-V (10)
  • Linux (8)
  • Microsoft 365 (26)
  • Powershell (21)
  • Security (7)
  • VDI (16)
  • Virtualization (21)
  • VMware (12)
  • Windows (21)
  • Windows Client OS (39)
  • Windows Server (92)

Archives

  • May 2025
  • April 2025
  • February 2025
  • January 2025
  • December 2024
  • November 2024
  • October 2024
  • September 2024
  • July 2024
  • June 2024
  • May 2024
  • April 2024
  • March 2024
  • February 2024
  • January 2024
  • December 2023
  • September 2023
  • August 2023
  • July 2023
  • June 2023
  • April 2023
  • March 2023
  • January 2023
  • December 2022
  • November 2022
  • October 2022
  • September 2022
  • August 2022
  • July 2022
  • June 2022
  • May 2022
  • February 2022
  • January 2022
  • December 2021
  • November 2021
  • October 2021
  • September 2021
  • August 2021
  • June 2021
  • May 2021
  • April 2021
  • March 2021
  • February 2021
  • December 2020
  • November 2020
  • September 2020
  • August 2020
  • July 2020
  • June 2020
  • May 2020
  • April 2020
  • March 2020
  • February 2020
  • November 2019
  • October 2019
  • September 2019
  • August 2019
  • July 2019
  • June 2019
  • May 2019
  • April 2019
  • March 2019

ajni IT © 2019