If you need to renew the Always On VPN IKEv2 server certificate, here are three lines that will help you. Assuming you have the right certificate and the thumbprint, execute the following commands on the VPN server:
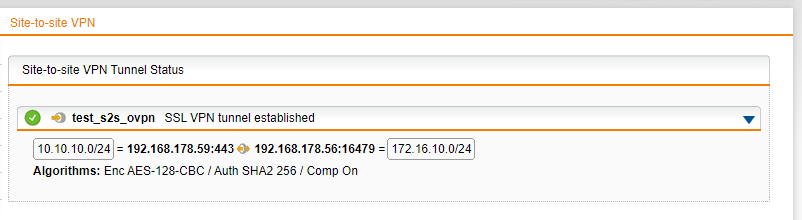
Sophos SG/XG Firewalls use OpenVPN to create Site To Site SSL VPN tunnels, but the configuration file is specific to Sophos firewalls. This can be converted to a normal ovpn file though.
Here is how you can manually convert the APC configuration file into an OVPN file.
Take now of these things in your apc file:
Block 1 is the client certificate:
—–BEGIN CERTIFICATE—–
Block 2 is the CA certificate:
—–BEGIN CERTIFICATE—–
Block 3 is the private key:
—–BEGIN PRIVATE KEY—–
—–END PRIVATE KEY—–
Block 4: there is also a username and password:
Just above the private key is the user:
Just below the private key is the password:
So now here is the ovpn file:
client dev tun proto tcp remote insert hostname or IP of the firewall here 443 route remote_host 255.255.255.255 net_gateway resolv-retry infinite nobind persist-key persist-tun auth-user-pass cipher AES-128-CBC auth SHA256 comp-lzo route-delay 4 verb 3 reneg-sec 0 <cert>
Insert certificate here from Block 1
</cert>
<ca>
Insert certificate here from Block 2
</ca>
<key>
Insert private key from Block 3
</key>
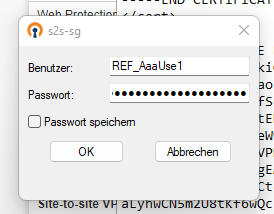
Here is a short test with OpenVPN client on Windows. The password has to be inserted manually, but normally the tunnel gets initiated from a firewall/network appliance, in that case you should be able to insert username and password in the command line.
If your users use a published application, you might have noticed that OneDrive does not automatically start after starting the app. This is by design, as it will only start in the full desktop, when Explorer.exe is running.
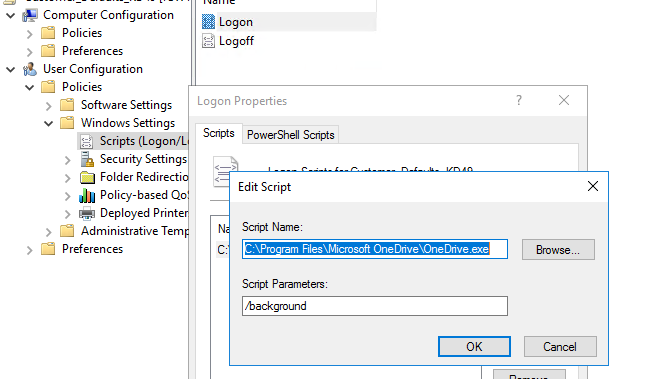
To ensure that Onedrive is starting with the Citrix Published Application, you can create a user logon script. This is one solution I have implemented, there are many others though.
C:\Program Files\Microsoft OneDrive\OneDrive.exe
/background
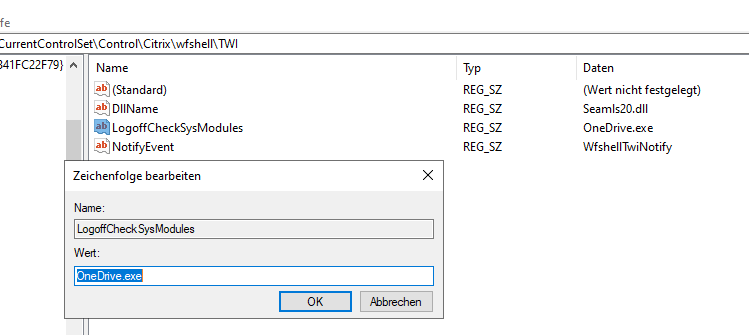
The other challenge: If the published application is closed, the session will still be open because Onedrive is still running, and the user will not be logged off. To change that behaviour, add Onedrive.exe and Microsoft.Sharepoint.exe as a value of this key:
This neat software makes it possible to convert an OST file into a fully functional PST file. You can even export single items inside the OST file if you would like to. But what’s an OST file? An OST file gets created by Outlook whenever you create a new Outlook profile. It is the current locally synchronized copy of your mailbox. With this format you cannot do much. A PST file, on the other hand, is a functional archive of an outlook profile. So why is there a need for an OST converter like Stellar Converter for OST?
When your OST file becomes inaccessible or gets corrupt, you are not able to access your mailbox items. The OST file gets corrupted due to several reasons, & you will come across with below-mentioned errors:
“Your offline folder file could not be configured \\ComputerName\FolderName\Outlook.ost”
“The operation failed due to a registry or installation problem. Restart Outlook and try again. If the problem persists, please reinstall.”
Steps to convert OST to PST using Stellar Converter for OST
This is what the program looks like once you opened the OST File of your Outlook profile:
You can either save single items:
Or convert the whole file into a PST:
The functional PST is now ready and can be kept somewhere safe:
Other features of Stellar Converter for OST:
Converts OST and saves files in PST, MSG, EML, RTF, HTML, and PDF formats.
Provides detailed preview of converted mail items & user can save 20 items for free
Provides different filter options to only save selected emails as per user need.
Converts encrypted OST files.
Supports preview and conversion of deleted items.
Provides an option to save & reload scanned information.
Supports MS Office 365, 2021, 2019, 2016, 2013, 2010, and 2007.
Supports Windows 11, Windows 10, Windows 8.1, Windows 8, and Windows 7.
You can learn more about Stellar Converter for OST and its conversion speed compared to other OST converter software in the market in this benchmark report. It’s an easy-to-use and efficient solution to convert or extract mail items from inaccessible, orphaned, or encrypted OST files of any Outlook version to PST or other supported formats. The software also helps you resolve common Outlook errors, restore lost or deleted emails, and import emails or mail items from an OST file directly to an existing Outlook profile, or live Exchange and Office 365 mailbox.
Microsoft SQL Server administration is a big topic, but this short installation and configuration guide might help you get started with that.
First of all, download Microsoft SQL Server 2019 Express. You might get other versions (like MS SQL Standard) from your organization’s Licensing Portal (VLSC). The installation and configuration steps are the same. SQL Express can only have a maximum database size of 10GB and some other limitations.
Run the downloaded installer and export it somewhere. The setup will launch. We need a new SQL Server instance:
We are performing a brand new installation (I already had installed an instance on this server)
We need the database engine services:
Give the instance a name. You might name the instance after your application.
Leave all this to default
The User Database and log directory should be changed. Normally you have one disk for the database and another disk for the log database, like this:
In some cases, you might limit the amount of RAM the instance can use:
Hit next and let the installation finalize.
Open SQL Server Configuration Manager. Here you should activate the TCP/IP protocol, so that your instance is reachable from a server in the network.
The service has to be restarted:
By default, the instance will have a high port assigned. This can be changed to a lower port like 1433,1434, etc.
Do not forget to restart the instance service after the changes.
Next, configure Windows Firewall. You will need these ports: UDP 1434 for SQL Server Browser and the instance port (the high port TCP 64891 or the manually configured port TCP 1434).
To verify the connection, install Microsoft SQL Server Management Studio on another server in the same domain.
On the left side, you should see something if the login was successful:
In some cases you might need to enable mixed mode authentication, which allows you to authenticate with SQL users (for example the SA user) while also maintaining Windows Authentication.
After this change, the instance service has to be restarted.