Here is a quick way to find inactive AD Users in your environment. Get-ADUser ist the cmdlet we are going to use.
We are getting all users from the highest OU (domain.com) and using the Property LastLogonDate, which will not be returned if not specified in the -Properties parameter. After that a Where statement is going to show users that haven’t logged in since 90 days or more.
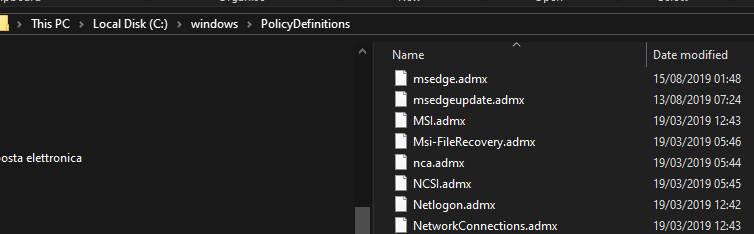
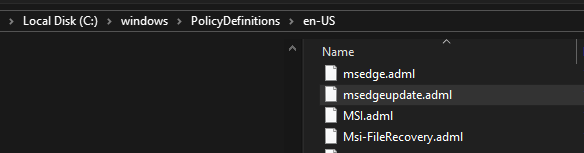
How to import them in the GP Editor? Easy. You can test them on your local machine first. Just copy the files msedge.admx and msedgeupdate.admx to C:\windows\PolicyDefinitions and the language .adml files to C:\windows\PolicyDefinitions\en-US.
In an Enterprise environment you normally move these files into the central group policy store, located under \\domain.com\SYSVOL\domain.com\policies\PolicyDefinitions.
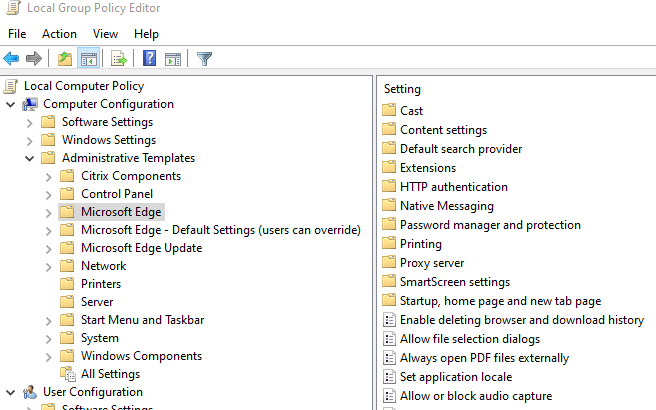
After opening Group Policy Editor (gpedit.msc), under Computer Configuration > Administrative Templates you will see the newly imported Policies:
Now let’s specifically configure the IE Mode feature. For that we need to configure two settings. The first will configure the IE Mode and the second one lists the websites that are affected by IE Mode.
Under Microsoft Edge > Configure Internet Explorer Integration you want to select Internet Explorer Mode in order to integrate IE with the new Edge in case one of the specificied URLs is visited:
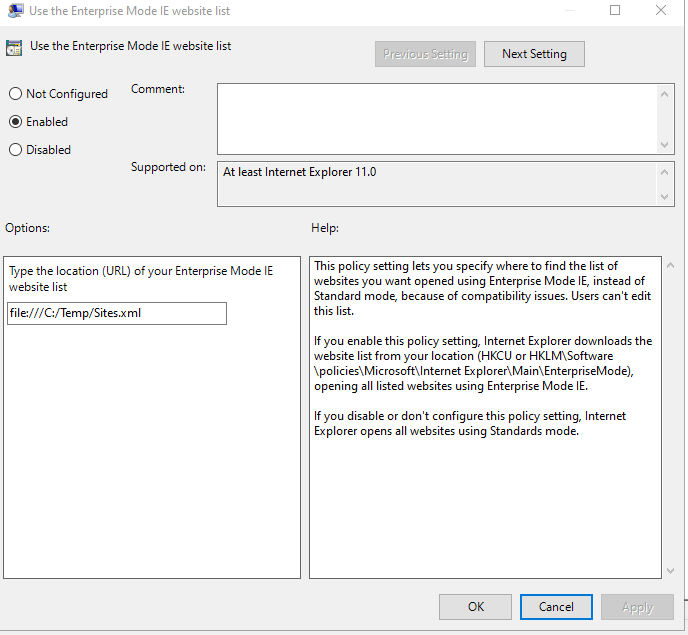
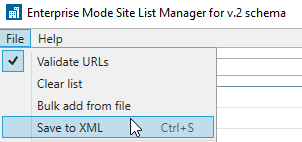
The second one is located under Windows Components > Internet Explorer > Use the Enterprise Mode IE Website List. You can use a file:///C:/local/path.xml, a \\network\path or a https://URL that hosts the XML file. I will be using a local path here.
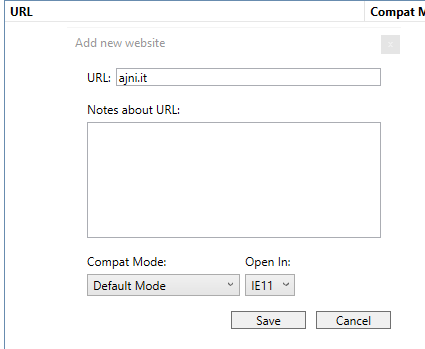
With the MS Tool Enterprise Mode Site List Manager you can easily add or edit the site list. Just add a new URL, select the IE Mode you want to use and save it as an XML.
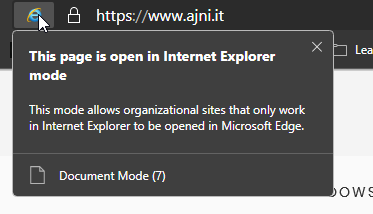
Now do a gpupdate /force, restart Edge and test your site. You will know that the policy has applied if you see the IE icon when you visit a site you have specified in the Enterprise Mode Site List Manager.
If you are having issues getting this to work, make sure your device has the latest Windows Updates installed, like stated in the Microsoft documentation.
Also this feature is not yet supported on Windows Server 2016 and some older versions of Windows 10.
If you have problems with MS Edge on Windows Server 2016 RDS with Citrix XenApp, you will have to exclude the process msedge.exe from Citrix hooks:
HKEY_LOCAL_MACHINE\SOFTWARE\Citrix\CtxHook
REG_SZ “ExcludedImageNames”
Value “msedge.exe”
Microsoft yesterday announced in their blog post that the Beta Build of their Edge Browser is generally available.
If you don’t know yet, Microsoft is replacing “old” Edge which had the EdgeHTML rendering engine with Chromium, a rendering engine Chrome also uses.
To this day, two channels were available for use: Canary and Dev. Canary updates daily and Dev weekly. The Beta channel should be a stable release containing the properly tested features and updates every 6 weeks.
Enterprise Customers can also download the Policy Files with the Administrative Templates (.admx). Some interesting settings are roaming profiles and Internet Explorer Mode. Roaming profiles make the deployment in RDS (formerly Terminal Services) environments very appealing.
Microsoft Edge can be downloaded here – you have the option to download any of the 3 different builds.
Are you trying to delete a local Windows User Profile because something doesn’t behave the way it should? Here is a quick and easy tip to remember.
Deleting a user profile is very straightforward, if you know how to. Just deleting C:\Users\<username> is not enough though. In fact stranger things might occur if you just delete the user’s folder.
There are two ways of deleting a user profile:
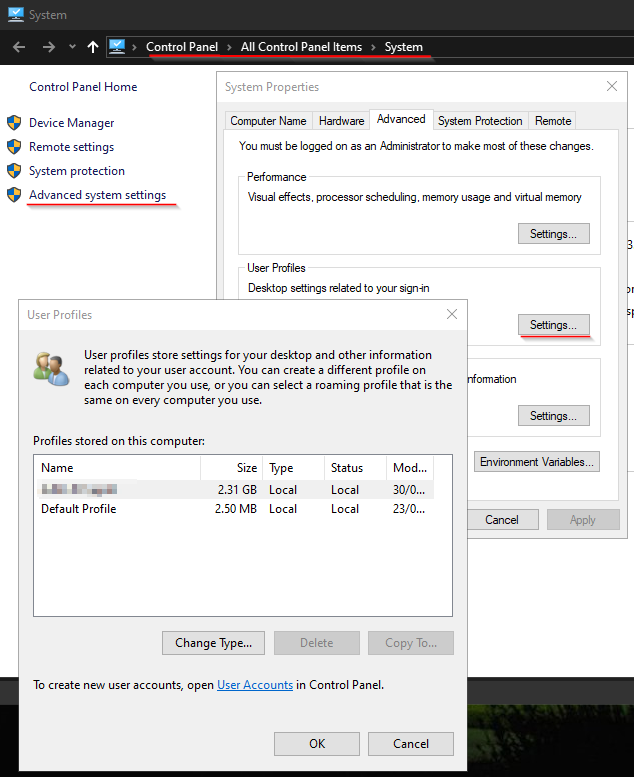
Method 1: Advanced System Settings (Very easy)
By going into the Advanced System Settings you can delete a user profile. The user obviously has to be logged off, otherwise the “Delete” button will be greyed out.
Method 2: Regedit
Note: It is always a good idea to make a backup of your current Registry entries BEFORE making any changes. You could for example rename the registry key or “Export” it by right clicking on the key you want to backup. Sub-keys are also backed up.
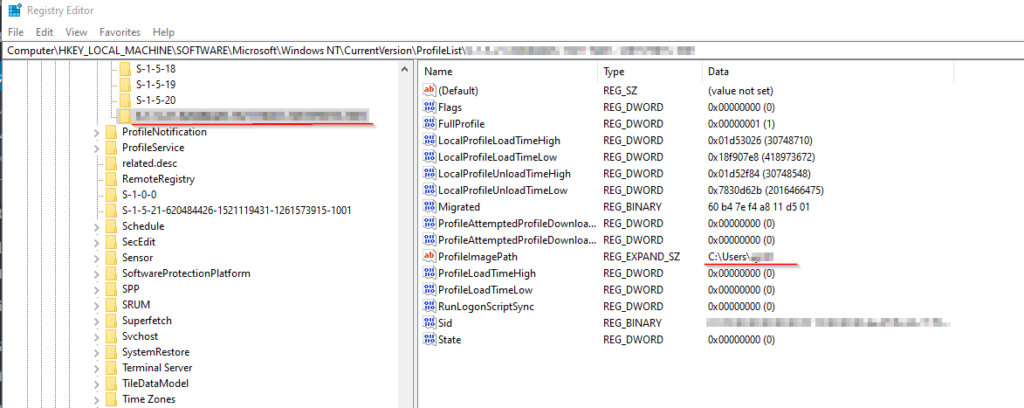
There are cases where the user profile is not listed in the Advanced System Settings, but the user folder is present under C:\Users. In that case you can firstly delete the profile SID under
Today my free SSL certificate expired, so I decided I could guide you to claim yours as well.
You will generate a Certificate Signing Request (CSR) on your local machine (I have a Linux VM hosting my site on Apache2), send the request to www.sslforfree.com and after that download your new signed certificate.
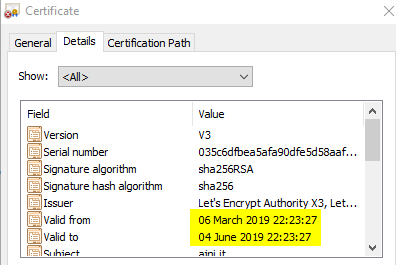
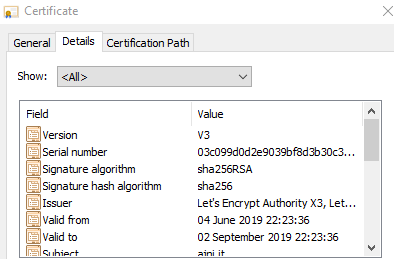
The process of obtaining a certificate is very simple and painless, however there is a catch: these kinds of certificates usually have a validity period of 4 months. Which means you have to renew it every so often.
Like mine here:
So let’s
get started.
Generating
your Certificate Signing request with openssl
First of all, you will need a config file, which contains all of the certificate’s attributes. Mine is named ajni.conf. Here is the content of the config file. I have highlighted the attributes you need to adapt based on your environment.
[ REQ ] default_bits = 2048 prompt = no encrypt_key = no default_md = sha256 distinguished_name = dn req_extensions = req_ext [ DN ] CN = ajni.it #Common Name emailAddress = ajnik@outlook.com O = Non Profit #Organization OU = Ajni #Organizational Unit L = Meran #Locality ST = Suedtirol #State C = IT #Country [ REQ_EXT ] subjectAltName = DNS: www.ajni.it, DNS: ajni.it
Now that you have a config file, you can execute the openssl command to generate a CSR. Once again, I have marked the variables.
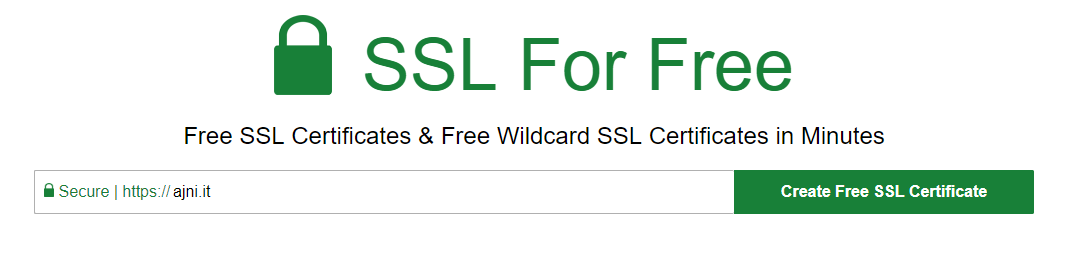
Go to www.sslforfree.com, insert your domain
name and hit Create Free SSL Certificate
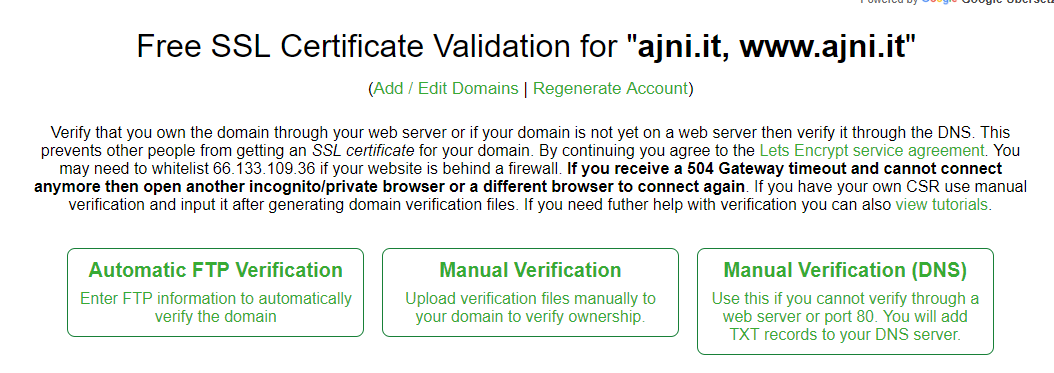
You have 3
options to prove to SSLforFree that the domain belongs to you:
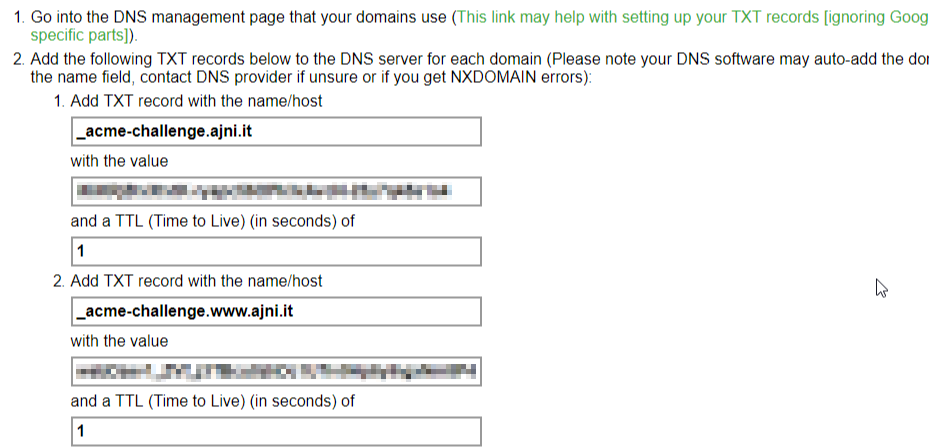
I chose to use the DNS verification (option 3). You will need to create 2 TXT records on your domain (for domain.it and for www.domain.it).
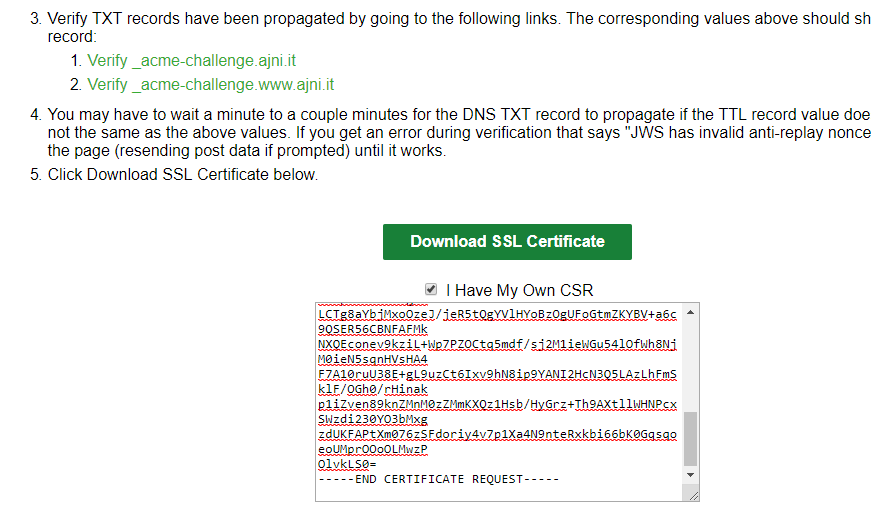
Once you have added both TXT records you can proceed to download the certificate. Select “I Have My Own CSR”, since you created one with openssl. It is, from a security standpoint, safer than letting SSLforFree create a private key for you.
Note that DNS records can take some time to replicate, so you might need to wait a few minutes before downloading the certificate.
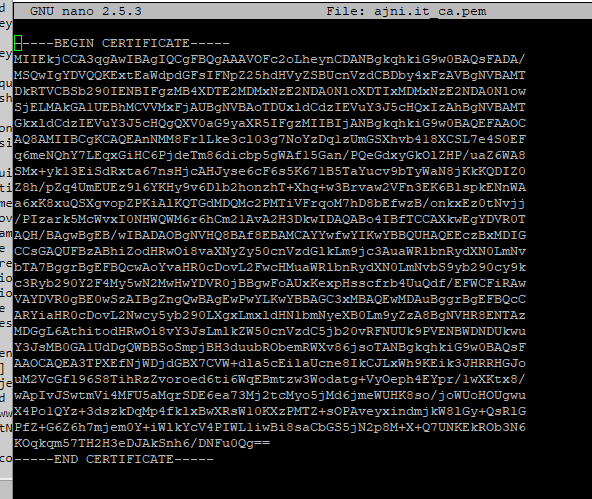
Now copy the content of the public certificate itself and the CA Bundle (which contains the Root and Intermediate Certificate). You will need them in order for the browser to trust your site/certificate.
Create 2 more text files, each containing the content of the 2 certificates. The files need a .pem extension:
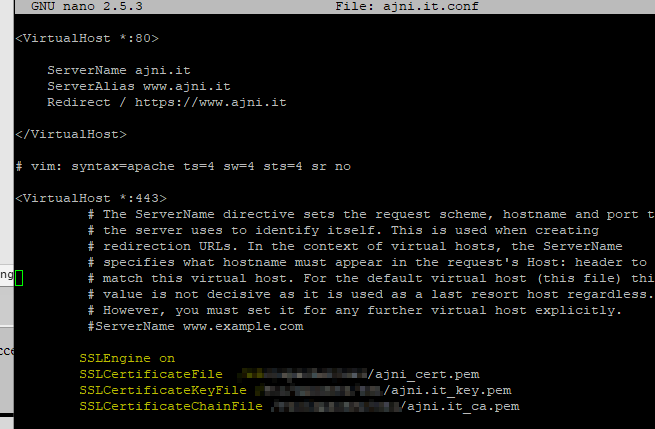
Modify your Apache2 config file
At this point you have 3 files in total: your public certificate, your private certificate and your CA certificate. Now change the config file of your apache virtual site under /etc/apache2/sites-enabled/domain.conf or default-ssl.conf.
The relevant parameters are SSLCertificateFile, SSLCertificateKeyFile and SSLCertificateChainFile. Set the path of your files. For example, /etc/apache2/cert.pem. You might need to enable the SSL apache2 module.
The www-data user needs read permission on those files.
a2enmod ssl
Restart Apache2
Lastly, restart the apache2 service
service apache2 restart
One browser refresh and my site has already the new certificate:
If you have any questions feel free to comment down there, I will happily assist you.